Quick Start
This document uses openEuler 20.03 LTS installed on the TaiShan 200 server as an example to describe how to quickly install and use openEuler OS. For details about the installation requirements and methods, see openEuler 20.03 LTS Installation Guide.
Installation Preparations
Hardware Compatibility
Table 1 describes the types of supported servers.
Table 1 Supported servers
Minimum Hardware Specifications
Table 2 lists the minimum hardware specifications supported by openEuler.
Table 2 Minimum hardware specifications
Component
Minimum Hardware Specifications
Description
Architecture
- AArch64
- x86_64
- 64-bit Arm architecture
- 64-bit Intel x86 architecture
CPU
- Huawei Kunpeng 920 series
- Intel ® Xeon® processor
-
Memory
≥ 4 GB (8 GB or higher recommended for better user experience)
-
Drive
≥ 120 GB (for better user experience)
- IDE, SATA, and SAS drives are supported.
- A driver software is required to use the NVMe drive with the DIF feature. Contact the drive manufacturer if the feature is not available.
Obtaining the Installation Source
Perform the following operations to obtain the openEuler release package:
Visit the openEuler website.
Click Downloads.
Click Community Editions. The version list is displayed.
Click Download on the right of openEuler 20.03 LTS.
Select the openEuler release package and verification file to be downloaded based on the architecture of the environment to be installed.
If the AArch64 architecture is used:
- Click aarch64.
- Click openEuler-20.03-LTS-aarch64-dvd.iso to download the openEuler release package to the local host.
- Click openEuler-20.03-LTS-aarch64-dvd.iso.sha256sum to download the openEuler verification file to the local host.
If the x86_64 architecture is used:
- Click x86_64.
- Click openEuler-20.03-LTS-x86_64-dvd.iso to download the openEuler release package to the local host.
- Click openEuler-20.03-LTS-x86_64-dvd.iso.sha256sum to download the openEuler verification file to the local host.
Release Package Integrity Check
To prevent incomplete download of the software package due to network or storage device problems during the transmission, you can perform the following steps to check the integrity of the obtained openEuler software package:
Obtain the verification value in the verification file. Run the following command:
cat openEuler-20.03-LTS-aarch64-dvd.iso.sha256sumCalculate the SHA256 verification value of the file. Run the following command:
sha256sum openEuler-20.03-LTS-aarch64-dvd.isoAfter the command is run, the verification value is displayed.
Check whether the values calculated in step 1 and step 2 are consistent.
If the verification values are consistent, the .iso file is not damaged. If they are inconsistent, you can confirm that the file is damaged and you need to obtain the file again.
Starting the Installation
Log in to the iBMC WebUI.
For details, see TaiShan 200 Server User Guide (Model 2280).
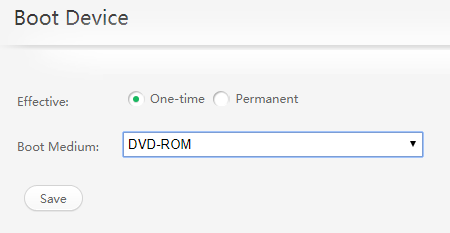
Choose Configuration from the main menu, and select Boot Device from the navigation tree. The Boot Device page is displayed.
Set Effective and Boot Medium to One-time and DVD-ROM, respectively, and click Save, as shown in Figure 1.
Choose Remote Console from the main menu. The Remote Console page is displayed.
Select an integrated remote console as required to access the remote virtual console, for example, Java Integrated Remote Console (Shared).
On the toolbar, click the icon shown in the following figure.
An image dialog box is displayed, as shown in the following figure.
Select Image File and then click Browse. The Open dialog box is displayed.
Select the image file and click Open. In the image dialog box, click Connect. If Connect changes to Disconnect, the virtual CD/DVD-ROM drive is connected to the server.
On the toolbar, click the restart icon shown in the following figure to restart the device.
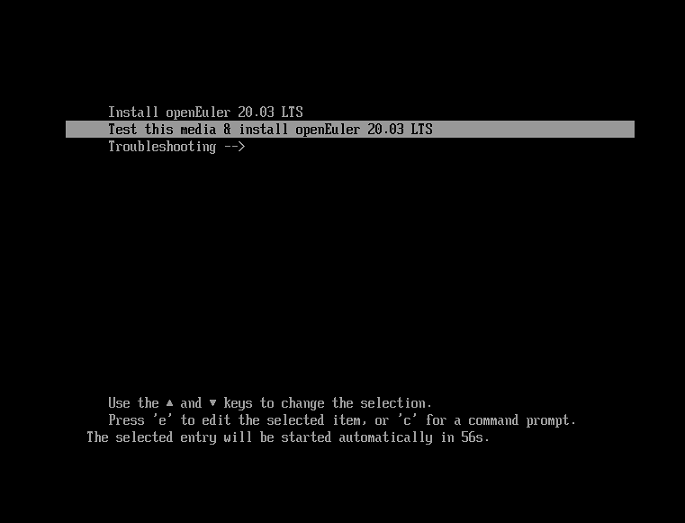
A boot menu is displayed after the system restarts, as shown in Figure 5.
 NOTE:
NOTE:- If you do not perform any operations within 1 minute, the system automatically selects the default option Test this media & install openEuler 20.03 LTS and enters the installation page.
- During PM installation, if you cannot use the arrow keys to select boot options and the system does not respond after you press Enter, click
 on the BMC page and configure Key & Mouse Reset.
On the installation wizard page, press Enter to select the default option Test this media & install openEuler 20.03 LTS to enter the GUI installation page.
Installation
After entering the GUI installation page, perform the following operations to install the system:
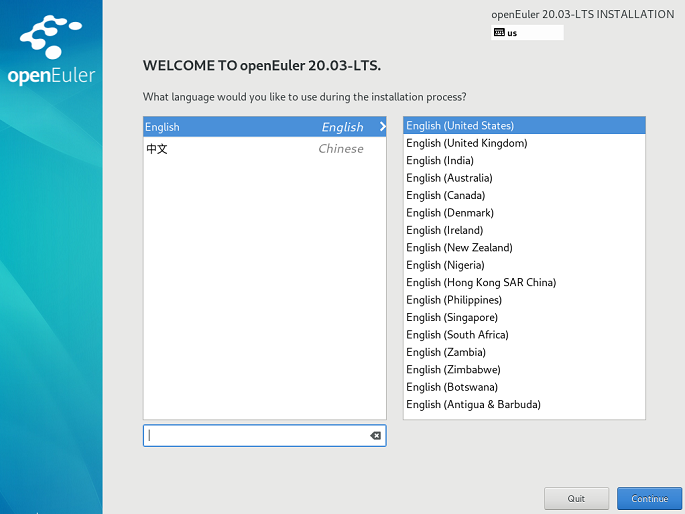
Set an installation language. The default language is English. You can change the language based on the site requirements, as shown in Figure 6.
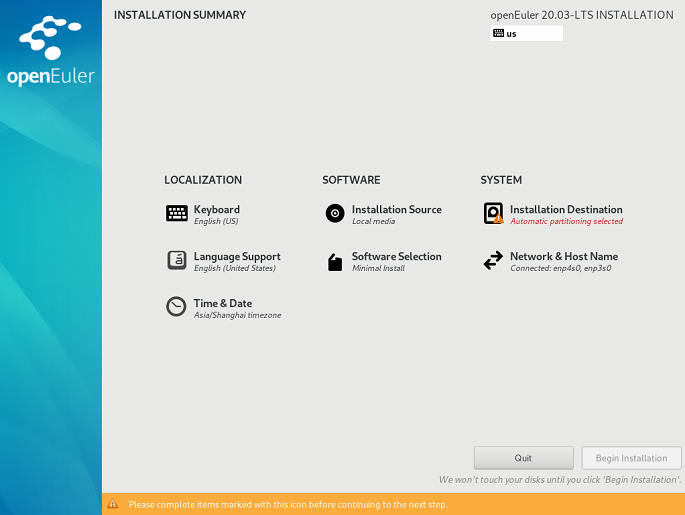
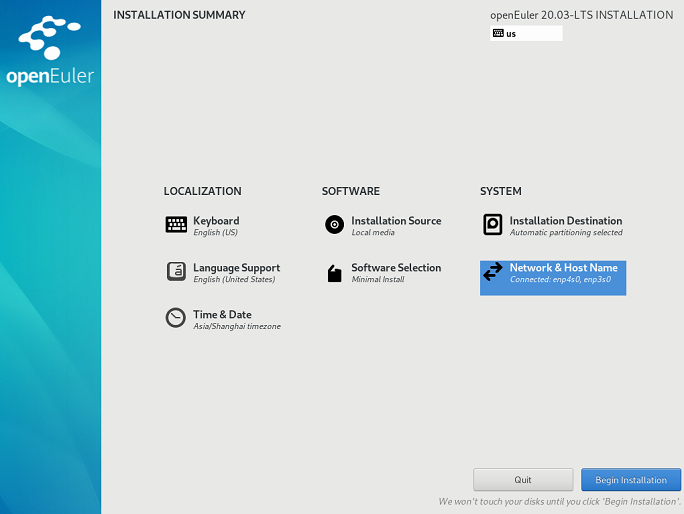
On the INSTALLATION SUMMARY page, set configuration items based on the site requirements.
- A configuration item with an alarm symbol must be configured. When the alarm symbol disappears, you can perform the next operation.
- A configuration item without an alarm symbol is configured by default.
- You can click Begin Installation to install the system only when all alarms are cleared.
Select Software Selection to set configuration items.
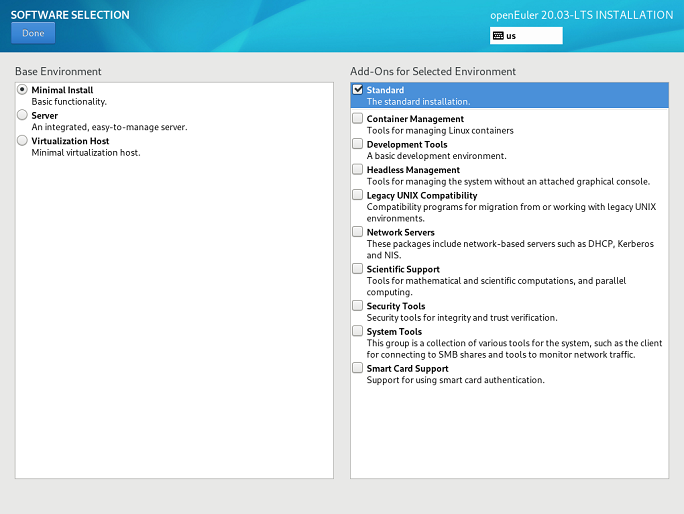
Based on the site requirements, select Minimal Install on the left box and select an add-on in the Add-Ons for Selected Environment area on the right, as shown in Figure 8.
Figure 8 Selecting installation software
 NOTE:
NOTE:- In Minimal Install mode, not all packages in the installation source will be installed. If the required package is not installed, you can mount the installation source to the local PC and configure a repo source, and use DNF to install the package.
- If you select Virtual Host, the virtualization components QEMU, libvirt, and edk2 are installed by default. You can select whether to install the OVS component in the add-on area.
After the setting is complete, click Done in the upper left corner to go back to the INSTALLATION SUMMARY page.
Select Installation Destination to set configuration items.
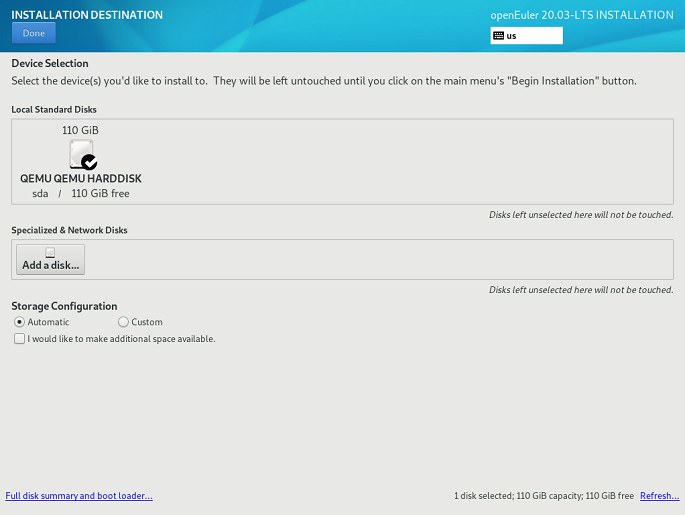
On the INSTALLATION DESTINATION page, select a local storage device or click Add a disk to add a specified additional device or network device. You also need to configure the storage to partition the system. You can either manually configure partitions or select Automatic to automatically configure partitioning. Select Automatic if the software is installed in a new storage device or the data in the storage device is not required, as shown in Figure 9.
 NOTICE:
When selecting the device to be installed, you are advised not to use the NVMe SSD storage medium as the OS installation disk.
NOTICE:
When selecting the device to be installed, you are advised not to use the NVMe SSD storage medium as the OS installation disk.Figure 9 Setting the installation destination
 NOTE:
NOTE:- During partitioning, to ensure system security and performance, you are advised to divide the device into the following partitions: /boot, /var, /var/log, /var/log/audit, /home, and /tmp.
- If the system is configured with the swap partition, the swap partition is used when the physical memory of the system is insufficient. Although the swap partition can be used to expand the physical memory, if the swap partition is used due to insufficient memory, the system response slows and the system performance deteriorates. Therefore, you are not advised to configure the swap partition in the system with sufficient physical memory or the performance sensitive system.
- If you need to split a logical volume group, select Custom to manually partition the logical volume group. On the MANUAL PARTITIONING page, click Modify in the Volume Group area to reconfigure the logical volume group.
After the setting is complete, click Done in the upper left corner to go back to the INSTALLATION SUMMARY page.
Set other configuration items. You can use the default values for other configuration items.
Click Begin Installation to install the system, as shown in Figure 10.
Set the root user password.
Click Root Password. In the displayed dialog box, as shown in Figure 11, enter a password and re-enter to confirm.
 NOTE:
The root password must be configured when you install software packages. Otherwise, the installation will fail. A root account is used for performing critical system administration tasks. It is not recommended to use this account for daily work or system access.
NOTE:
The root password must be configured when you install software packages. Otherwise, the installation will fail. A root account is used for performing critical system administration tasks. It is not recommended to use this account for daily work or system access.The password of the root user must meet the password complexity requirements. Otherwise, the password configuration or user creation will fail. The password complexity requirements are as follows:
- A password must contain at least eight characters.
- A password must contain at least three of the following types: uppercase letters, lowercase letters, digits, and special characters.
- A password must be different from the account name.
- A password cannot contain words in the dictionary.
Querying a dictionary
In the installed openEuler environment, you can run the following command to export the dictionary library file dictionary.txt, and then check whether the password is in the dictionary.
cracklib-unpacker /usr/share/cracklib/pw_dict > dictionary.txtModifying a dictionary
Modify the exported dictionary library file, and then run the following command to update the dictionary library:
create-cracklib-dict dictionary.txtRun the following command to add another dictionary file custom.txt to the original dictionary library.
create-cracklib-dict dictionary.txt custom.txt
Create a user.
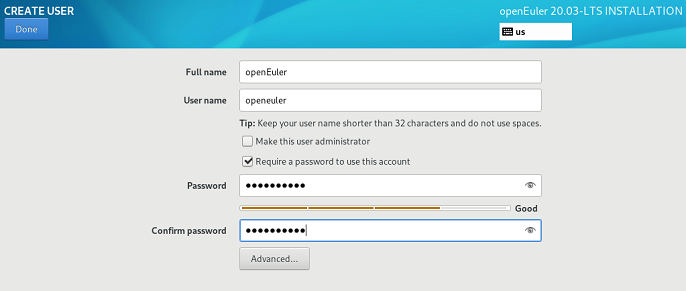
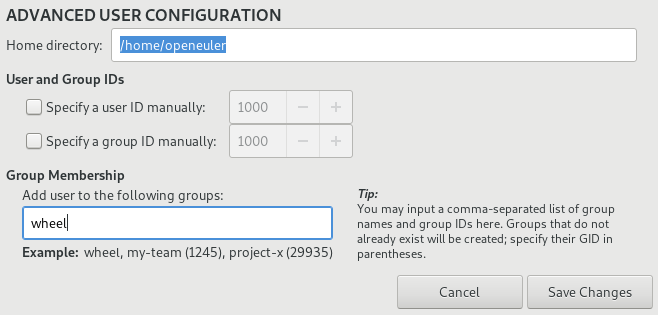
Click User Creation. Figure 12 shows the page for creating a user. Enter a username and set a password. The password complexity requirements are the same as those of the user root. By clicking Advanced, you can also configure a home directory and a user group, as shown in Figure 13.
Figure 13 Advanced user configuration
After configuration, click Done in the left-upper corner to switch back to the installation process page.
After the installation is complete, restart the system.
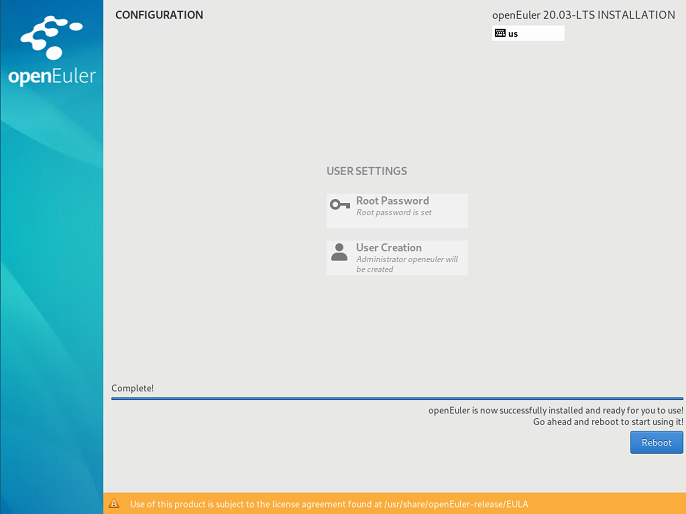
openEuler has been installed, as shown in Figure 14. Click Reboot to restart the system.
Viewing System Information
After the system is installed and restarted, the system CLI login page is displayed. Enter the username and password set during the installation to log in to openEuler OS and view the following system information. For details about system management and configuration, see the openEuler 20.03 LTS Administrator Guide.
Run the following command to view the system information:
cat /etc/os-releaseFor example, the command and output are as follows:
$ cat /etc/os-release
NAME="openEuler"
VERSION="20.03 (LTS)"
ID="openEuler"
VERSION_ID="20.03"
PRETTY_NAME="openEuler 20.03 (LTS)"
ANSI_COLOR="0;31"
View system resource information.
Run the following command to view the CPU information:
lscpuRun the following command to view the memory information:
freeRun the following command to view the disk information:
fdisk -lRun the following command to view the IP address:
ip addr


