DDE Desktop Environment
Overview
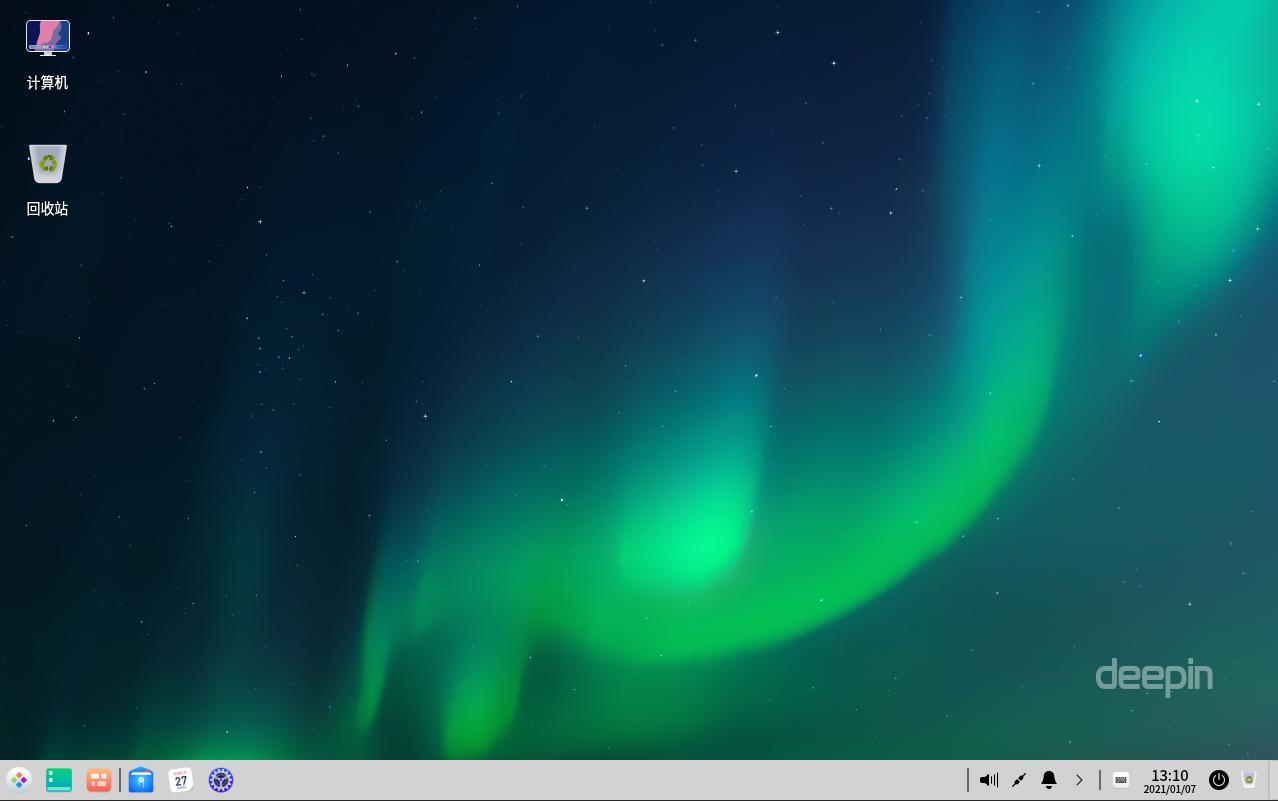
DDE desktop environment is an elegant, secure, reliable and easy to use GUI comprised of the desktop, dock, launcher and control center. Acting as the key basis for our operating system, its main interface is shown as below.
Getting Started
When you enter DDE for the very first time, a welcome program will automatically start. You can watch the introduction video, select your desktop style and icon theme, and learn more about the system functions.

Desktop
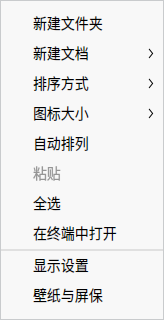
Desktop is the main screen you see after logging in. On the desktop, you can create a new file/folder, sort files, open in terminal, set wallpaper and screensaver and etc. You can also add shortcuts for applications on desktop by using Send to desktop.
Create New Folder/Document
Just as in File Manager, you can create a new folder/document on the desktop, or do some operations for the files on it.
- Right-click the desktop, select New folder and enter the name for it.
- Right-click the desktop, select New document, select the type and enter its name.
Right-click a file or folder on the desktop, and use the features of File Manager as below:
| Function | Description |
|---|---|
| Open with | Select an app to open it. |
| Cut | Move it to another location. |
| Copy | Copy it to another location. |
| Rename | Change its name. |
| Delete | Delete and move it to the trash. |
| Create link | Create a shortcut of the file or folder. |
| Tag information | Add a tag. |
| Compress/Extract | Compress the file or folder, or extract the compressed file. |
| Properties | View the basic info, share it or change the permission. |
Sort Files
Sort the files on your desktop to make it organized and fit your needs.
- Right-click the desktop.
- Click Sort by, you can:
- Click Name to display files in the name sequence.
- Click Size to display files in the size sequence.
- Click Type to display files in type.
- Click Time modified to display files in the order of last modified date.
Tips: Check Auto arrange, icons on the desktop will be listed in order automatically, and if an icon is removed, another one will fill in the blank.
Adjust Icon Size
- Right-click the desktop.
- Click Icon size, and choose a proper size.
/
scrolling mouse wheel to adjust icon size on the desktop and in Launcher.
Set Display
You can set display scaling, screen resolution, brightness and so on from the desktop.
- Right-click the desktop.
- Click Display Settings to open the settings in Control Center.
Notes: For specific operations, please refer to Display.
Change Wallpaper
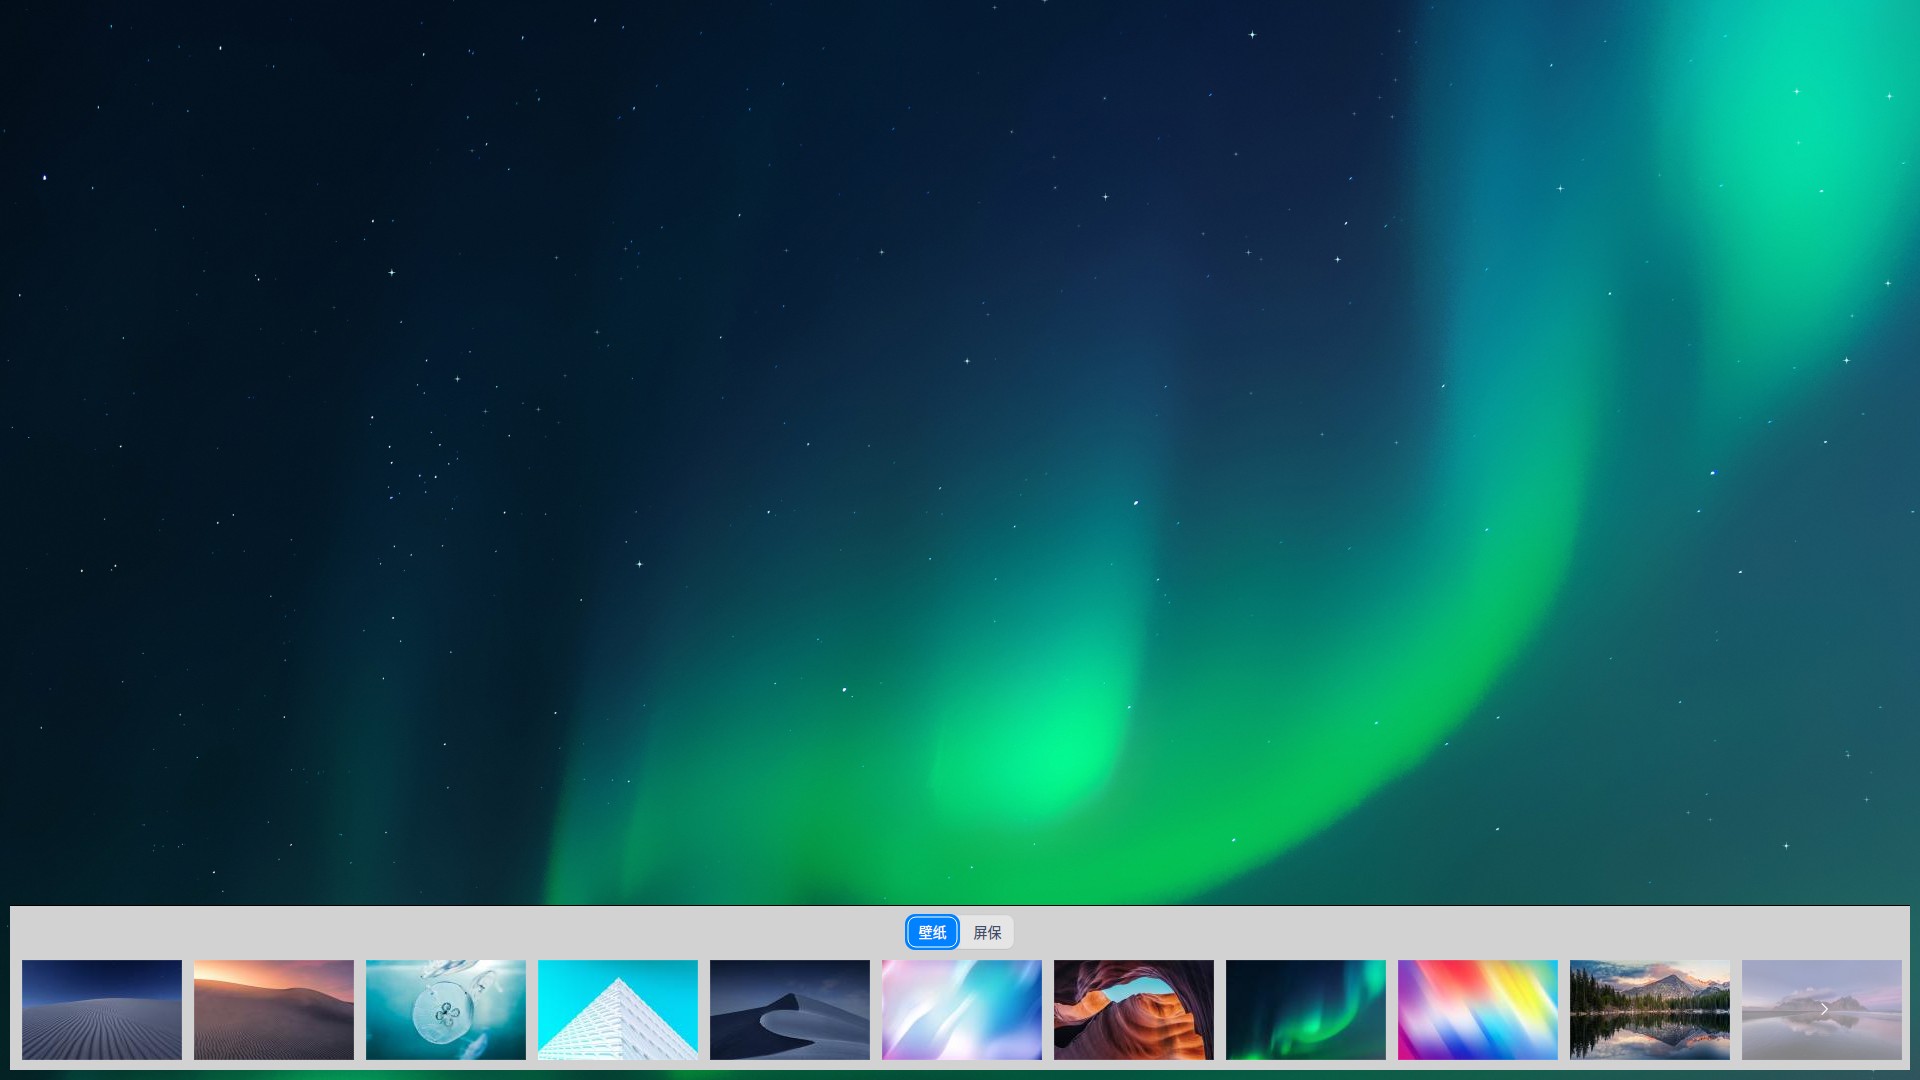
Select some elegant and fashionable wallpapers to beautify your desktop and make it distinctive.
- Right-click the desktop.
- Click Wallpaper and Screensaver to preview all the wallpapers.
- Click your favorite one and it will apply in your desktop and screen lock.
- You can also choose Only desktop or Only lock screen.
Clipboard
All the texts, pictures and documents cut and copied by the current user after login are displayed in the clipboard, which can be copied quickly by double-clicking the clipboard. The clipboard is cleared automatically after logout and shutdown.
Use the shortcuts Ctrl+Alt+ V to wake up the clipboard.
Double-click in the clipboard to copy the current content quickly and the corresponding block will be moved to the top of the clipboard.
Select the target destination to paste it.
Click
 to delete the current content and click Clear All to clear the clipboard.
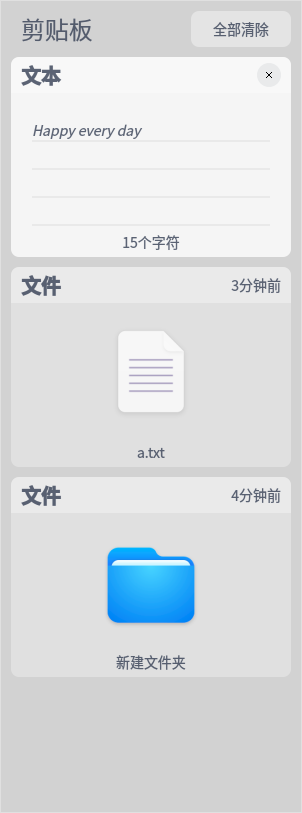
Dock
Dock is at the bottom of the desktop by default to help you quickly open frequently-used applications, which includes Launcher, applications, system tray, and plugins. In the dock, you can open launcher, show the desktop, enter the workspaces, open and exit apps, set input methods, adjust the volume, connect to the network, view the calendar and enter the shutdown interface, and so on.
Icons on Dock
In the Dock, there are icons of Launcher, applications, system tray, and plugins.

| Icon | Description |
|---|---|
 | Launcher - click to view all the installed applications. |
 | Click to show the desktop. |
 | File Manager - click to view files and folders on the disk. |
 | Calendar - view dates and create new schedules. |
 | Control Center - click to check or change system settings. |
 | Notification Center - show all notifications from the system and applications. |
 | Onboard virtual keyboard. |
 | Click to enter the shutdown interface. |
 | Trash. |
Switch Display Mode
There are two display modes of Dock: fashion mode and efficient mode, icon sizes are different in them.

You can switch the display modes by the following operations:
- Right-click the Dock and select Mode.
- Select the display mode.
Change Dock Location
You can place Dock on any direction of your desktop.
- Right-click the Dock and select Location.
- Select a location.
Change Dock Height
Drag the top edge to increase or decrease the height.
Show/Hide Plugins
- Right-click the Dock and select Plugins.
- On the submenu, you can check or uncheck Trash, Power, Show Desktop, Onboard, and Datetime to show or hide the corresponding icon in the Dock.
View Notifications
When there are system or application notifications, they will be shown in the middle of the screen. If there are buttons in the message, click buttons to do the actions; if there are not, click the message to close it.
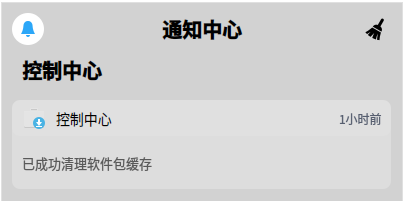
Click in Dock to view all the notifications.
View Date and Time
- Hover the cursor over the Time icon in Dock to view the current time, date and day of the week.
- Click the Time icon to open Calendar.
Enter Shutdown Interface
There are two ways to enter the shutdown interface:
- Click in Dock.
- Click
 at the bottom right corner of Launcher mini mode.
| Function | Description |
|---|---|
| Shut down | Shut down the computer. |
Reboot  | Restart the computer. |
Lock  | Lock the computer with the password. Or press Super + L to lock it. |
Switch user  | Log in with another user account. |
Log out  | End all the processes and initialize the system. |
Start system monitor | View the running processes and end the one you want. |
Trash
You can find all deleted files in the trash, which can be restored or emptied.
Restore Files
You can restore deleted files in Trash or press Ctrl + Z to restore the lately deleted files.
- Select the file in the trash.
- Right-click the file and select Restore.
- The file will be in its original path.
Attention: If the original folder of the file has been deleted, the deleted file will be restored to a new folder automatically created.
Empty Trash
In the trash, click Empty to permanently delete all the files in the trash.
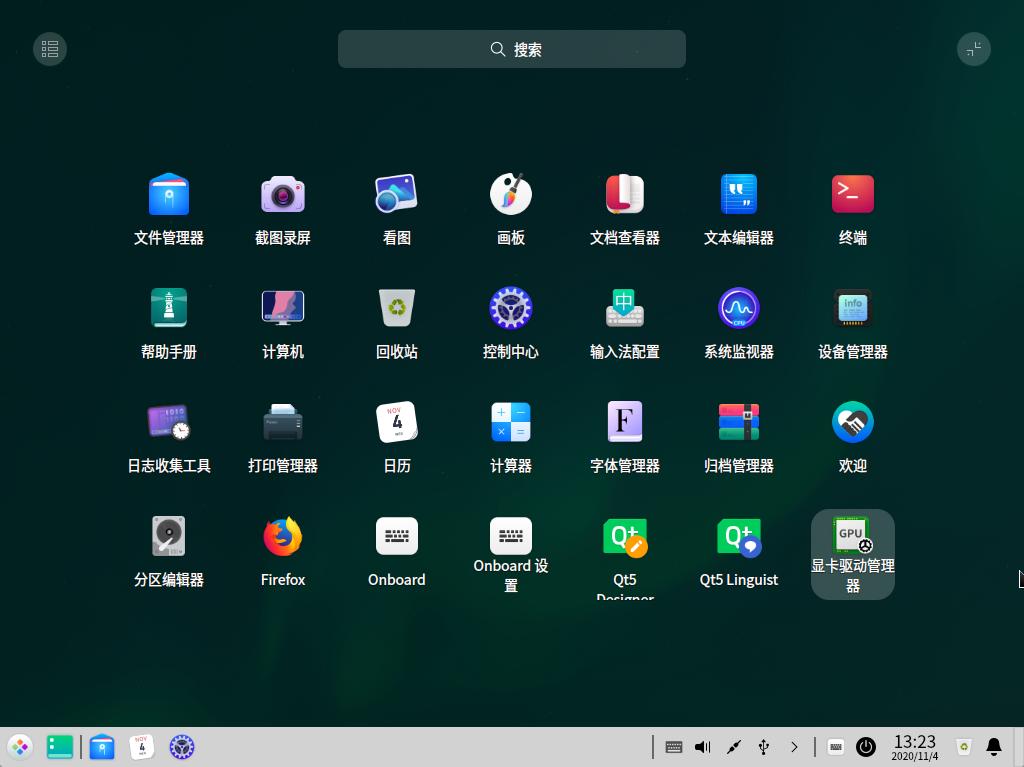
Launcher
Launcher helps you manage all the installed applications, where you can quickly find an application by category navigation or by a search.
Switch Launcher Modes
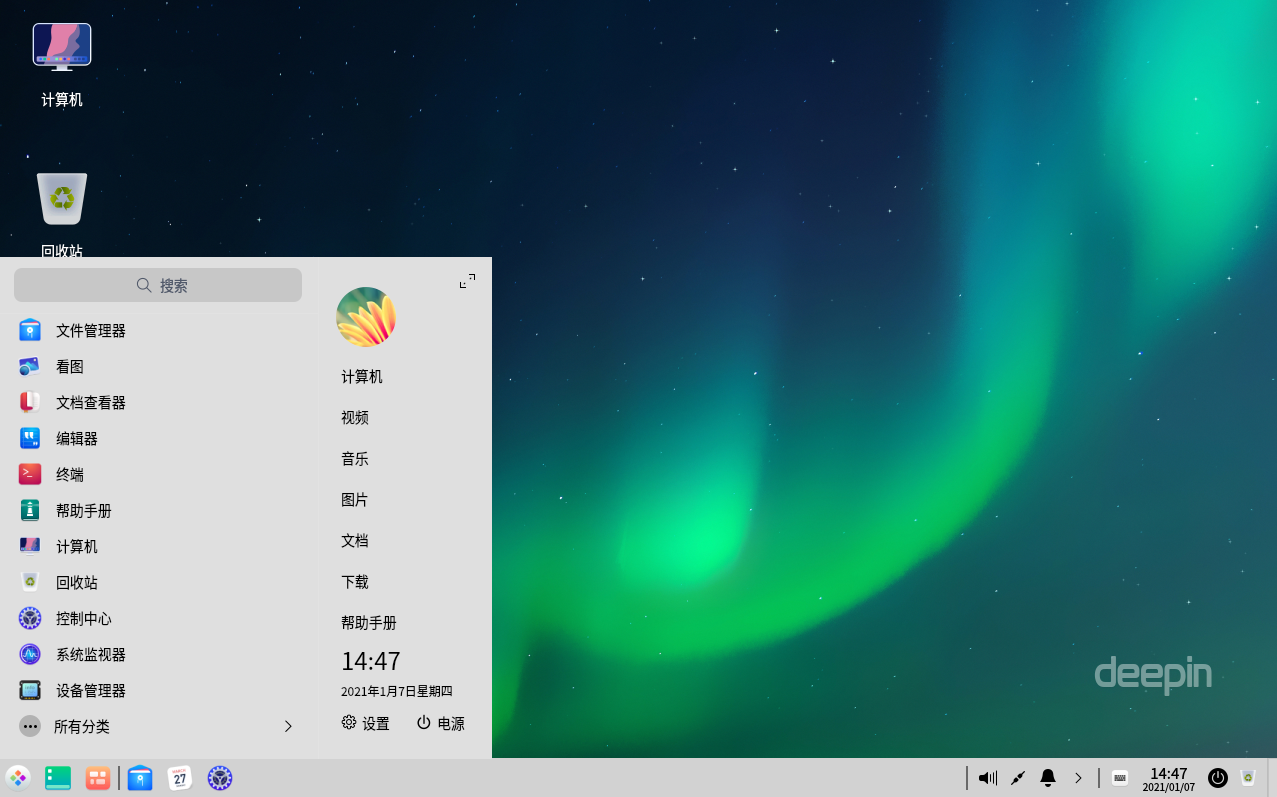
There are two display modes of Launcher: fullscreen mode and mini mode. Click the icon at the upper right corner to switch modes.
Both modes support searching applications and sending them to the desktop or Dock.
The mini mode also supports opening File Manager, Control Center and shutdown interface directly.
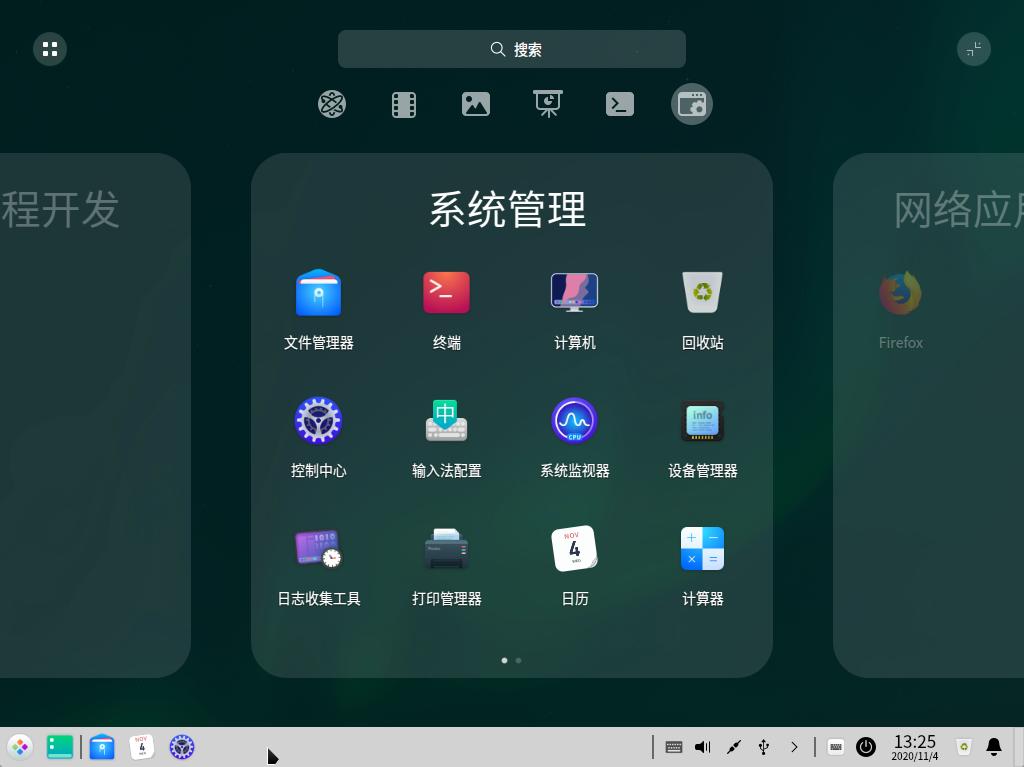
Sort Applications
In fullscreen mode, all applications in Launcher are listed by the installation time by default. You can sort the application icons as the ways below:
- Hover the cursor over an application icon, hold down the left key of mouse, drag and drop the application icon to arrange it freely.
- Click the category icon
 on the upper left in Launcher to arrange the icons by category.
In mini mode, applications are displayed according to using frequency by default.
Find Applications
In Launcher, you can scroll up and down to find an application, or locate it with the category navigation.
If you already know the application name, just search for it.
Set App Shortcut
The shortcut offers a method to run applications easily and quickly.
Create App Shortcut
Send the application icon to the desktop or Dock to facilitate the follow-up operations.
In Launcher, right-click an app icon and you can:
- Select Send to desktop to create a shortcut on the desktop.
- Select Send to dock to fix the application icon in Dock.

Delete Shortcut
Delete a shortcut from the desktop directly, or remove it from Dock or Launcher.
Remove the shortcut from Dock:
- Hold down the left key of mouse, drag and drop the icon away from Dock.
- You cannot drag and drop the application icon while it is running. Then you can right-click the application icon in Dock and select Undock to remove it from Dock.
Remove the shortcut from Launcher:
In Launcher, right-click the icon and you can:
- Select Remove from desktop to delete the shortcut from the desktop.
- Select Remove from dock to remove the application icon from Dock.
Run Applications
For the applications whose shortcuts have been created on the desktop or Dock, you can open them in the following ways:
- Double-click the desktop icon or right-click it and select Open.
- Click the application icon in Dock or right-click it and select Open.
To open the application only shown in Launcher, click the icon or right-click it and select Open.
Control Center
You can manage the system settings in Control Center, including account management, network settings, date and time, personalization, display settings, etc. After entering the desktop environment, click to open Control Center.
Homepage Introduction
The homepage of Control Center provides several setting modules and click one to enter the detailed settings.
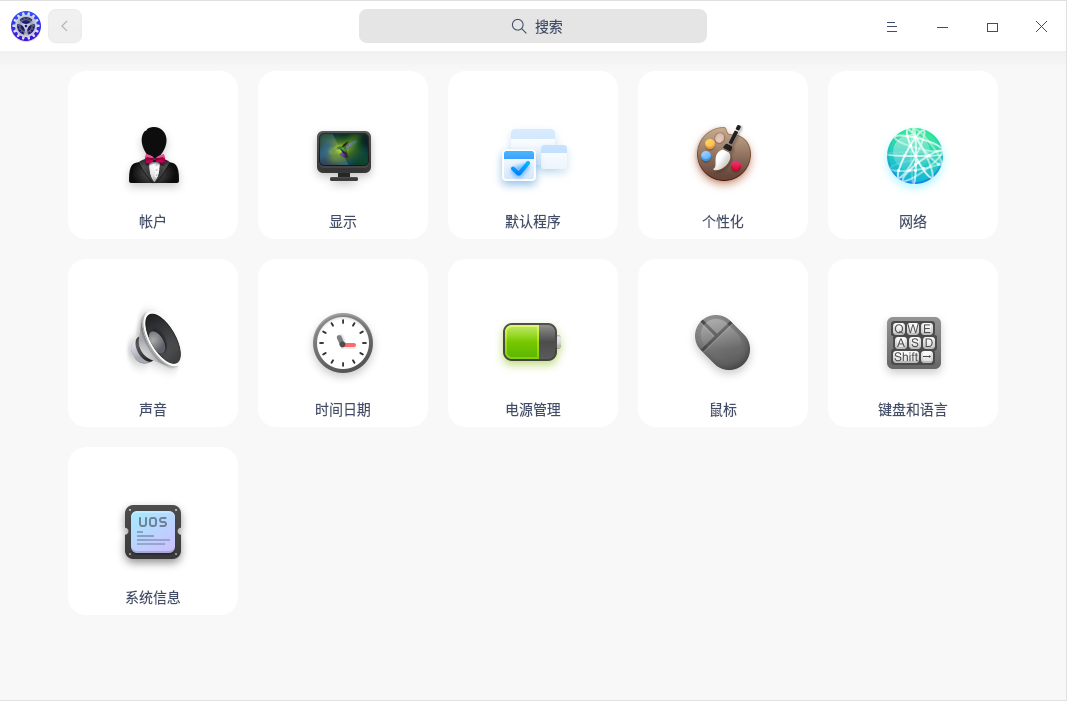
Once you open a setting module in Control Center, the navigation appears on the left. Click the left navigation to quickly switch to other settings.
Title Bar
The title bar contains the back button, search box, main menu and the window buttons.
- Back button: Click
 to go back to the homepage.
 - Search box: Input a keyword and search the related settings.
- Main menu: Click
 to enter the main menu where you can set the window theme, view the manual and exit.
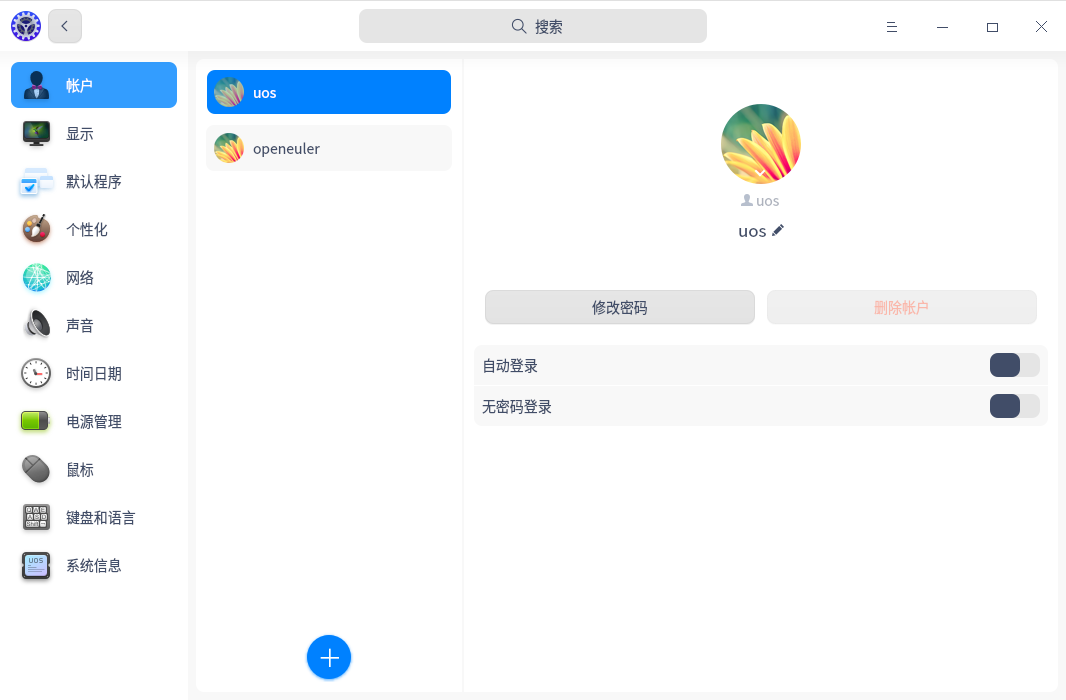
Accounts
You have already created an account when installing the system. Here you can modify account settings or create a new one.
Create New Account
- On the homepage of Control Center, click
 .
. - Click
 .
. - Input a username and a password twice.
- Click Create.
- Input the password of the current user account in the authentication dialog box, and the new account will be added to the account list.
Change Account Avatar
- On the homepage of Control Center, click .
- Click an existing account in the list.
- Click the user avatar.
- Select a avatar or upload a local avatar.
Set Full Name
The account full name is shown in account list and system login interface and you can set it as needed.
- On the homepage of Control Center, click .
- Click an existing account in the list.
- Click
 after Full Name, and input a name.
Change Password
On the homepage of Control Center, click
.Click the current account.
Click Change Password.
Input a new password twice and confirm.
Delete Account
- On the homepage of Control Center, click .
- Click an account that's not logged in.
- Click Delete Account.
- Click Delete in the pop-up window.
Privilege
The first account has administrator privilege when you install the system. All other accounts you add after that are common users. One account can be grouped in many user groups.
Group Setting
When you add or modify accounts, you can:
- Select a group existing in the system.
- Select the group with the same name as the current user.
- Select the group with the same name as another user when the account was previously added.
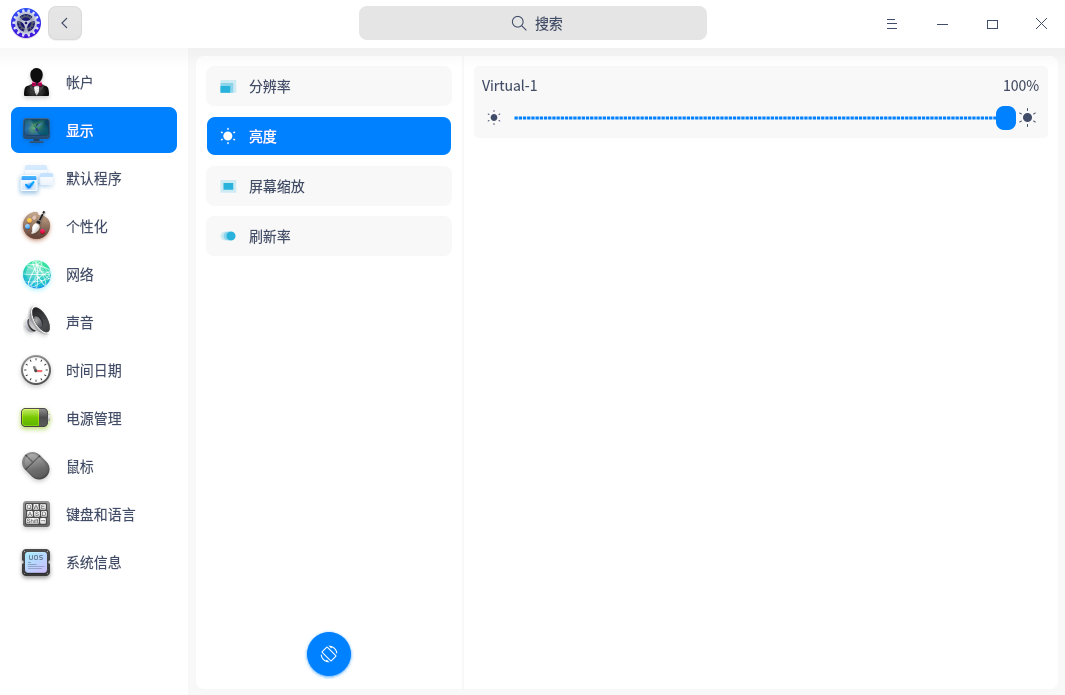
Display
Set screen resolution, brightness, direction and display scaling properly to have the best visual effect.
Single Screen Settings
Change Resolution
- On the homepage of Control Center, click
 .
. - Click Resolution.
- Select a proper resolution in the list.
- Click Save.
Adjust Brightness
- On the homepage of Control Center, click .
- Click Brightness.
- Drag the slider to set screen brightness.
- Switch on Night Shift, the screen hue will be auto-adjusted according to your location.
- Switch on Auto Brightness, the monitor will change the brightness automatically according to ambient light (shown only if PC has a light sensor).
Change Refresh Rate
- On the homepage of Control Center, click .
- Click Refresh Rate.
- Select a proper one, and click Save.
Change Display Direction
- On the homepage of Control Center, click .
- Click
 .
. - Every time you click, the screen will rotate 90 degrees counterclockwise.
- To restore to the original direction, click the right button to exit; to use the current direction, press Ctrl+ S to save it.
Multiple Screen Settings
Expand your desktop by multiple screens! Use VGA/HDMI/DP cable to connect your computer to other display devices.
- On the homepage of Control Center, click .
- Click Multiple Displays.
- Select a display mode:
- Duplicate: display the same image on other screens.
- Extend: expand the desktop across the screens.
- Customize: customize the display settings for multiple screens.
In multiple displays, press Super + P to show its OSD.
Operations are as follows:
- Hold Super and press P or click to select the options.
- Release the keys, the selected mode will take into effect.
Custom Settings
- On the homepage of Control Center, click .
- Click Multiple Displays > Customize.
- Click Recognize.
- Choose Merge or Split the screens, specify the main screen, set the resolution and refresh rate, and rotate screen if you want.
- Click Save.
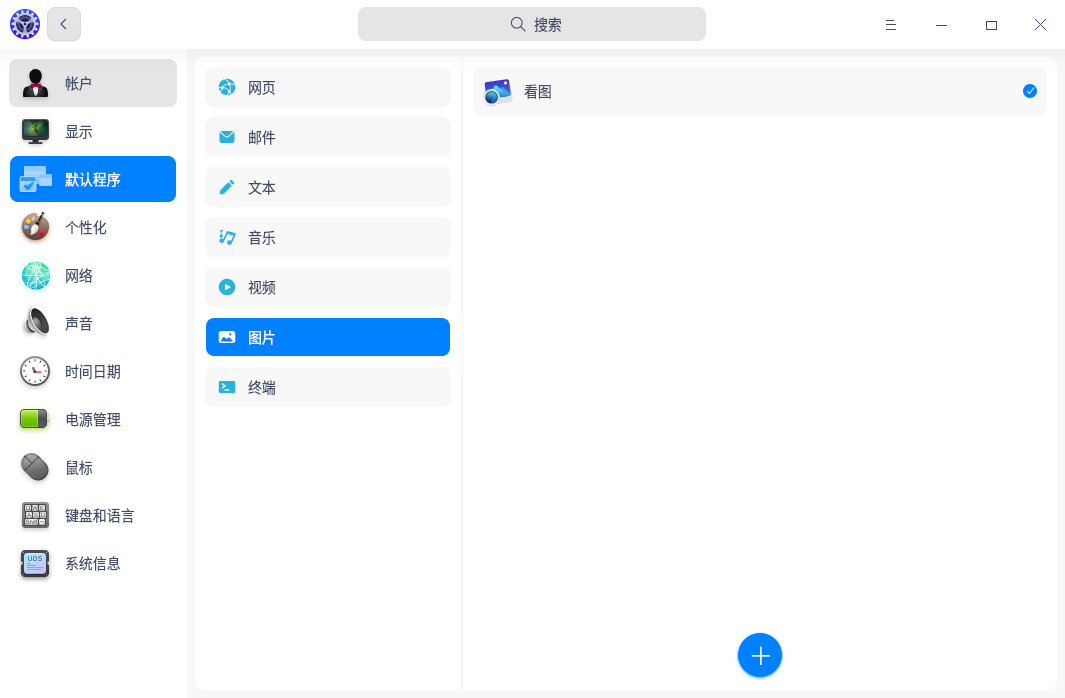
Default Application Settings
If you have installed several applications with similar functions, such as text editor, choose one of them to be the default application to open that type of file.
Set Default Application
- Right-click the file, choose Open with > Set default program.
- Select one application, Set as default is checked by default, and click Confirm.
- The application will automatically be added to the default application list in Control Center.
Change Default Application
- On the homepage of Control Center, click
 .
. - Select a file type.
- Select another one in the list as the default application.
Add Default Application
- On the homepage of Control Center, click .
- Select a file type.
- Click below to add a desktop file (usually at /usr/share/applications) or a specified binary file as the default application.
- The application will be added to the list and set as default application automatically.
Delete Default Application
In the default application list, you can only delete the applications you added. To remove other applications from the list, the only way is to uninstall them. Once uninstalled, they will automatically be deleted from the list.
To delete the default applications you have added, do as below:
- On the homepage of Control Center, click .
- Select a file type.
- Click after the application name to delete it.
Personalization Settings
You can set theme, accent color, font, change the appearance of the desktop and windows to your favorite style.
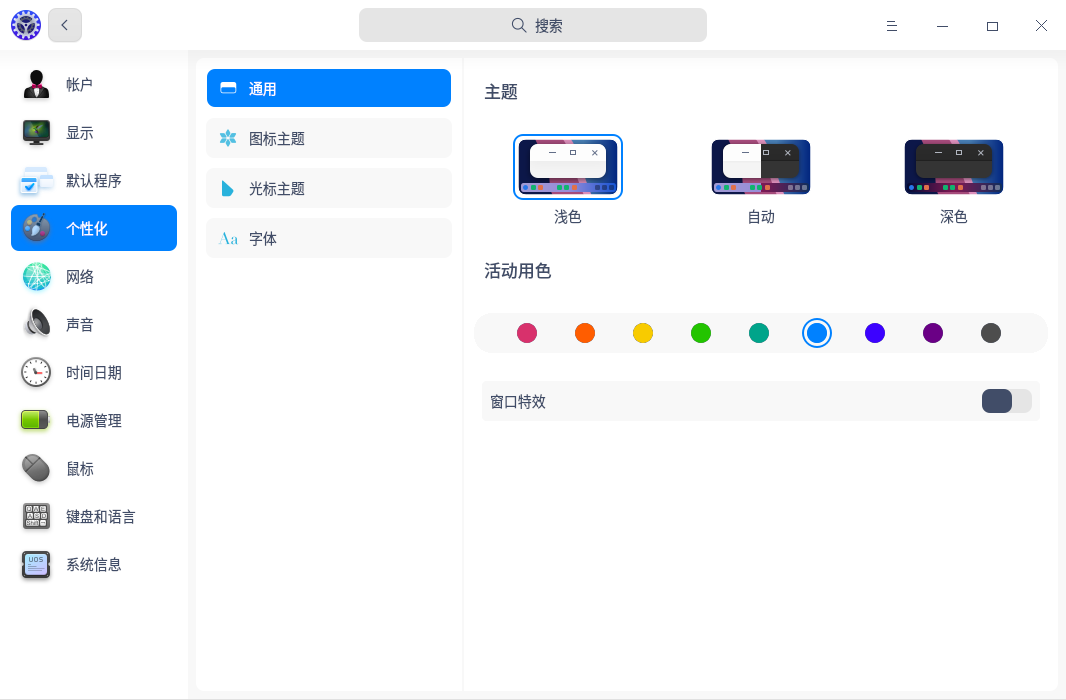
Set Window Theme
- On the homepage of Control Center, click
 .
. - Click General.
- Select one window theme, which will be used as system theme.
Change Accent Color
Accent color refers to the color used when you select one option or file in the system.
- On the homepage of Control Center, click .
- Click General.
- Pick a color under Accent Color and view its effects.
Set Icon Theme
- On the homepage of Control Center, click .
- Click Icon Theme and select an icon style.
Set Cursor Theme
- On the homepage of Control Center, click .
- Click Cursor Theme and select a set of cursors.
Change Font
- On the homepage of Control Center, click .
- Click Font.
- Set the font and font size for the system.
Network Settings
After login, you need to connect to a network first and then surf the Internet!
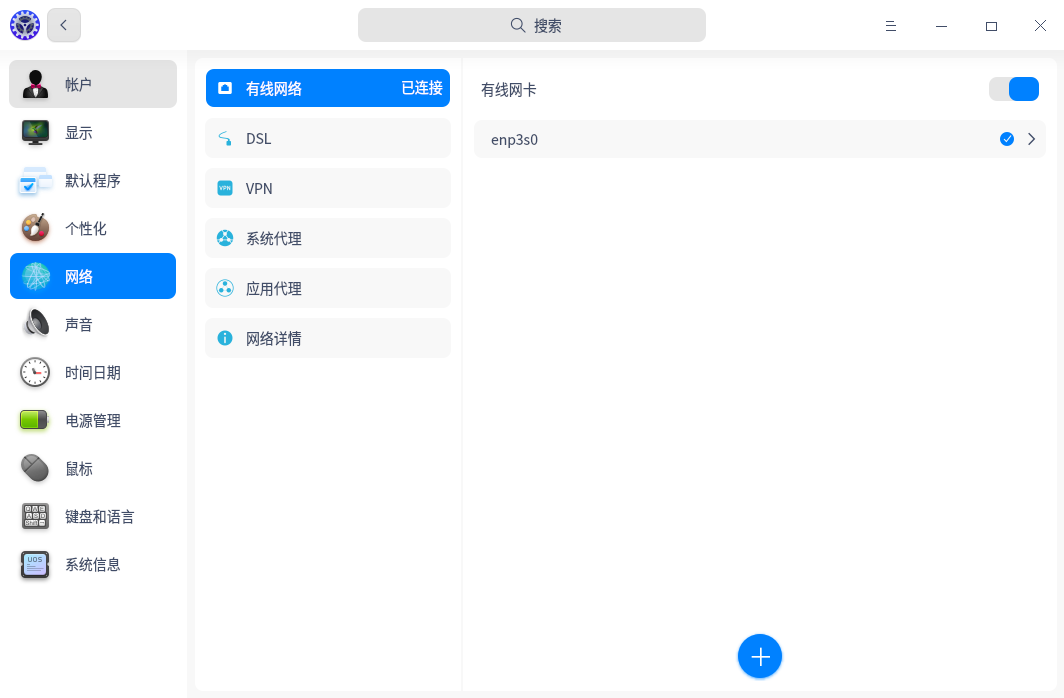
Wired Network
Wired network is secure and stable, which makes it the most common way to connect to the Internet. After your router is set, connect both ends of the network cable to the computer and router to connect to a wired network.
- Plug the cable into the network slot of a computer.
- Plug another end of the cable into the router or network port.
- On the homepage of Control Center, click
 .
. - Click Wired Network to enter the setting page of wired network.
- Switch on Wired Network Adapter to enable wired network.
- If it is successfully connected to the network, there will be a prompt "Wired Connection connected".
You can also edit and add a new wired network in the setting page.
Mobile Network
If you are at a place without network, mobile network adapter is a useful tool to help you connect to the Internet as long as the place is covered by telephone signals.
- Plug the mobile network adapter into your computer USB port.
- Your computer will auto connect to the network.
- On the homepage of Control Center, click .
- Click Mobile Network to view the detailed network info.
DSL/PPPoE Connections
DSL is a dial-up connection using a standard phone line and analog modem to access the Internet. Configure the modem, plug the telephone line into the network interface of the computer, create a broadband dial-up connection, and enter the user name and password provided by the operator to dial up the Internet.
Create a PPPoE Connection
- On the homepage of Control Center, click .
- Click DSL.
- Click .
- Enter the name, your account and password the operator provides.
- Click Save. The connection will automatically start.
VPN
VPN is a virtual private network. Its main function is to establish a private network on the public network for encrypted communication. Whether you are on a business trip or working at home, you can use VPN to access intranet resources as long as you can access the Internet. You can also use VPN to speed up access to websites in other countries.
- On the homepage of Control Center, click .
- Click VPN, and click or
 .
. - Select the VPN protocol type, and enter the name, gateway, account, password and other information. (Importing VPN will automatically fill in information)
- Click Save, the system will try to connect VPN network automatically.
- You can export the VPN settings to backup or share with other users.
System Proxy
- On the homepage of Control Center, click .
- Click System Proxy.
- Click None and Save to disable the proxy.
- Click Manual and input the address and port of proxy servers.
- Click Auto and input a URL to configure the proxy info.
Application Proxy
- On the homepage of Control Center, click .
- Click Application Proxy.
- Select a proxy type, and fill in the IP address, port, etc.
- Click Save to save the proxy settings.
Network Info
You can view MAC, IP address, gateway and other network info in network details.
- On the homepage of Control Center, click .
- Click Network Details.
- View the network info of the current network.
Sound Settings
Set your speaker and microphone properly to make you hear more comfortable and make clearer recordings.
Output
On the homepage of Control Center, click
 .
.Click Output to:
Select output device type from the dropdown list after Output Device.
Drag the slider to adjust output volume and left/right balance.
Switch on Volume Boost, the volume could be adjustable from 0~150% (the former range is 0~100%).
Input
- On the homepage of Control Center, click .
- Click Input to:
- Select input device type from the dropdown list after Input Device.
- Adjust input volume by dragging the slider.
- You can enable Automatic Noise Suppression by clicking the button after "Automatic Noise Suppression".
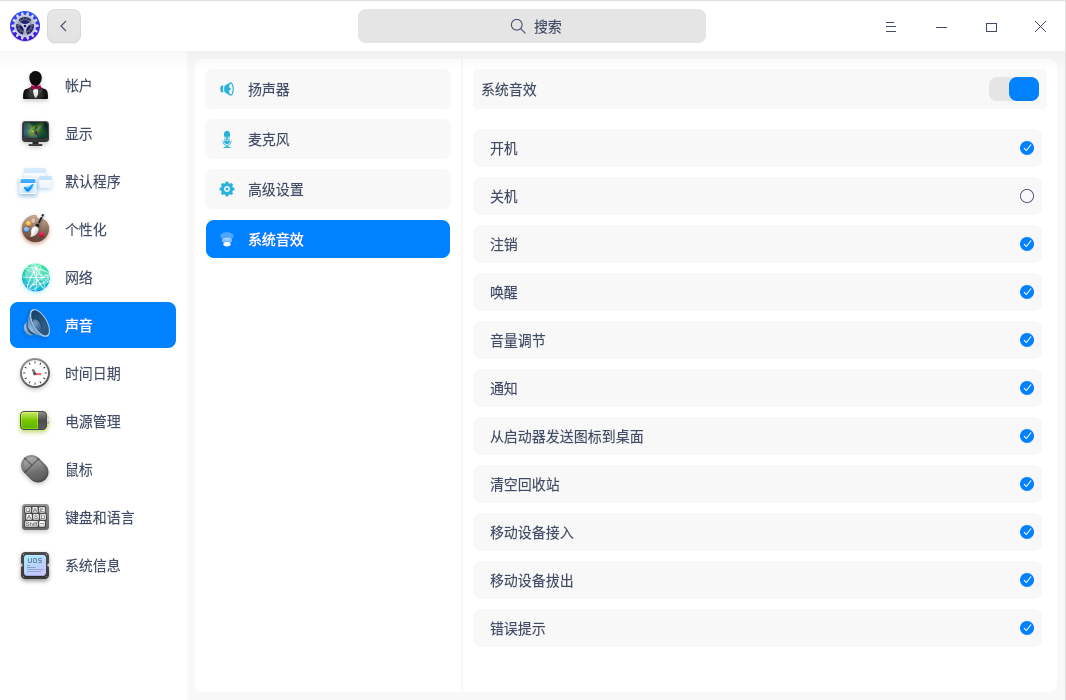
System Sound Effects
- On the homepage of Control Center, click .
- Click Sound Effects, check the options you want to switch on the sound when the corresponding event occurs.
Date and Time
Set your timezone properly to have correct date and time. You can also change them manually.
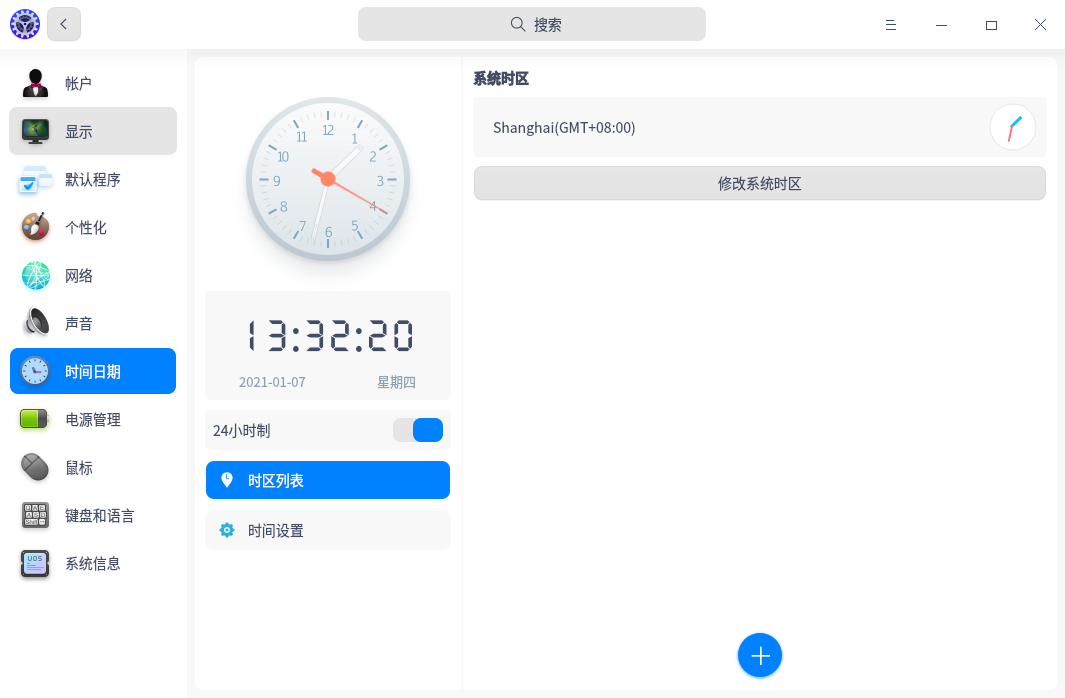
Change Timezone
You have selected the timezone during system installation and do as follows to change it.
- On the homepage of Control Center, click
 .
. - Click Timezone List.
- Click Change System Timezone and select a timezone by searching or clicking on the map.
- Click Confirm.
Add Timezone
Add another timezone to see the date and time there.
- On the homepage of Control Center, click .
- Click Timezone List.
- Click , select a timezone by searching or clicking on the map.
- Click Add.
Delete Timezone
- On the homepage of Control Center, click .
- Click Timezone List.
- Click Edit after "Timezone List".
- Click
 to remove the timezone.
Change Date and Time
Note that the auto-sync function will be disabled after changing date and time manually.
- On the homepage of Control Center, click .
- Click Time Settings.
- Switch on/off Auto Sync.
- Enter the correct date and time.
- Click Confirm.
Set Time Format
Setting the format of time and date is supported.
- On the homepage of Control Center, click .
- Click Time Format to set the first day of week, long date, short date, long time, and short time.
Power Management
Power management helps you to improve system safety.
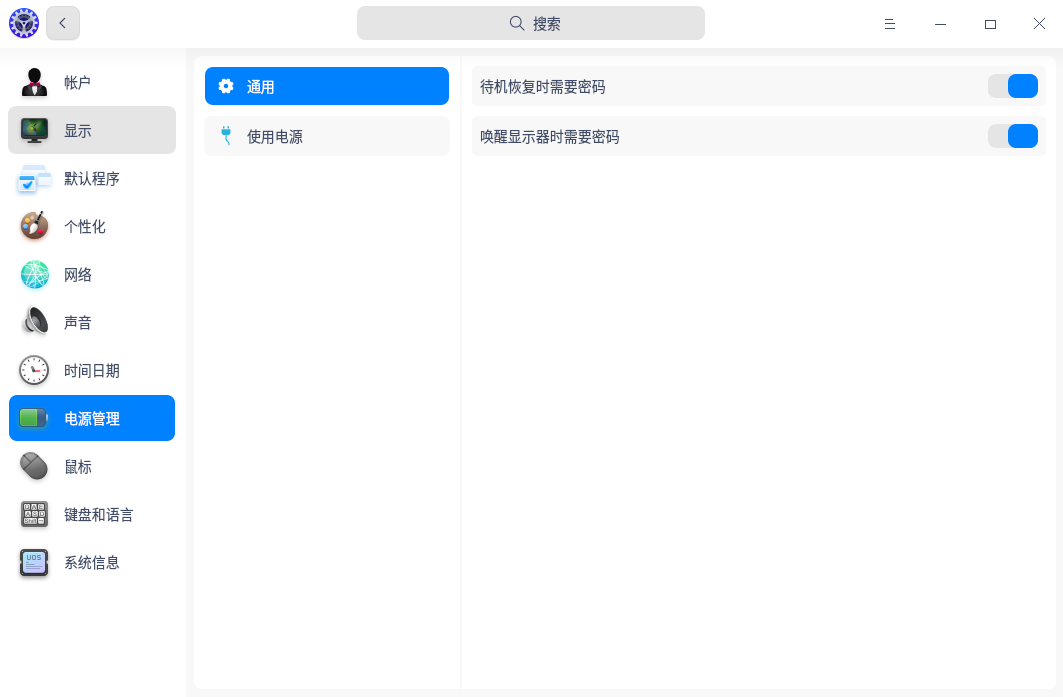
Time to Suspend
- On the homepage of Control Center, click
 .
. - Click Plugged In.
- Set the time to suspend.
Time to Lock Screen
- On the homepage of Control Center, click .
- Click Plugged In.
- Set the time to lock screen.
Power button settings
- On the homepage of Control Center, click .
- Click Plugged In.
- You can select Shut down, Suspend, Hibernate, Turn off the monitor, Do nothing from the drop-down list after When pressing the power button.
Any operation done here will take effect immediately. At the same time, the system will notify the user that the power button setting is changed.
Mouse
Mouse is common computer input device. Using the mouse, you can make the operation easier and faster.
General Settings
- On the homepage of Control Center, click
 .
. - Click General.
- Switch on Left Hand, and adjust Scrolling Speed, Double-click Speed.
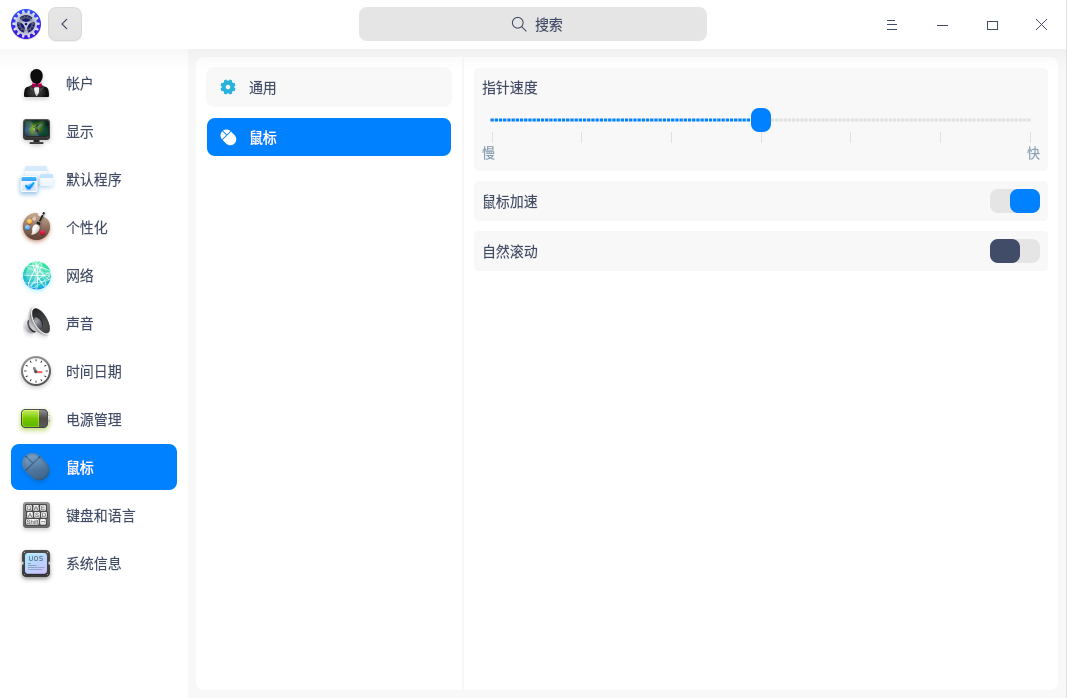
Mouse
After inserting or connecting the mouse, make relevant settings in the Control Center to make it more in line with your usage habits.
- On the homepage of Control Center, click .
- Click Mouse.
- Adjust Pointer Speed, which helps you to control the speed at which the pointer moves as the mouse moves.
- Switch on Natural Scrolling/Mouse Acceleration if you want.
- Turn on the mouse acceleration to improve the accuracy of the pointer. The moving distance of the mouse pointer on the screen will increase according to the acceleration of the moving speed. It can be turned on or off according to the usage.
- If Natural Scrolling is enabled, when you scroll down, the page will scroll down, when you scroll up, the page will scroll up as well.
Keyboard and Language
Set keyboard properties and select your keyboard layout to keep your typing habit. You can also adjust the keyboard layout according to the country and language, change system language, and customize shortcuts here.
Keyboard Properties
- On the homepage of Control Center, click
 .
. - Click General.
- Adjust Repeat Delay/Repeat Rate.
- Click "Test here" and hold down a key to test the repeat rate.
- Switch on Numeric Keypad and Caps Lock Prompt if you want.
Keyboard Layout
Set the keyboard layout to customize the keyboard for the current language. When you press a key on the keyboard, the keyboard layout controls which characters are displayed on the screen. After changing the keyboard layout, the characters on the screen may not match the characters on the keyboard keys.
You have set a keyboard layout during system installation, but you can add more for other purposes.
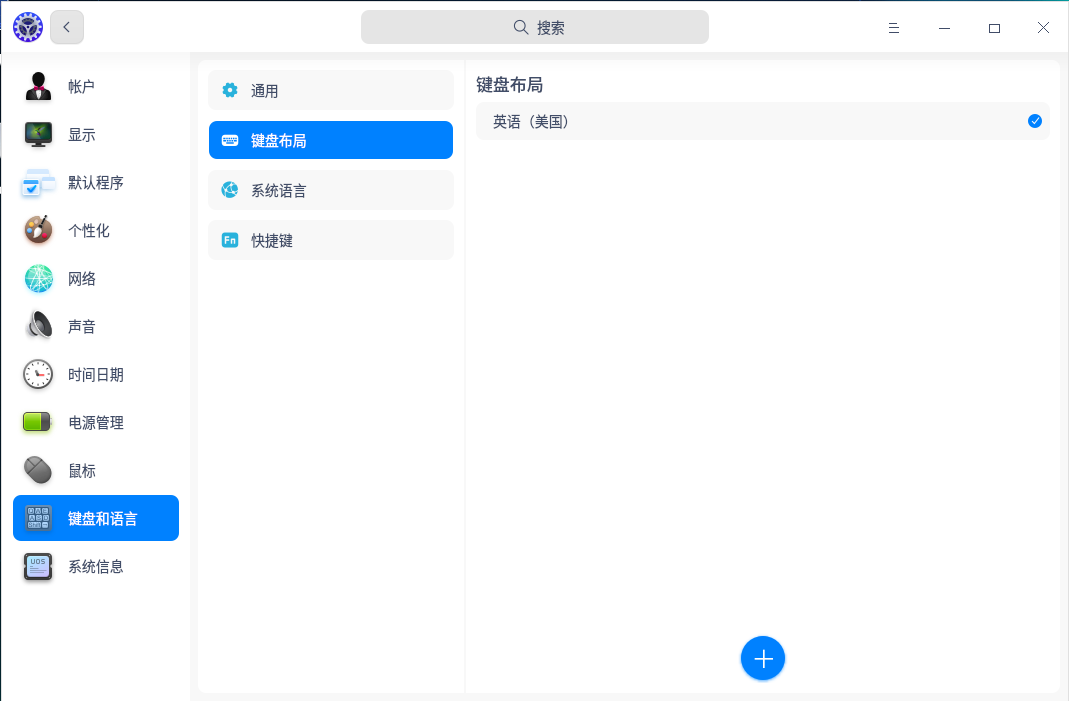
Add Keyboard Layout
- On the homepage of Control Center, click .
- Click Keyboard Layout.
- Click . Click a keyboard layout to add it.
Delete Keyboard Layout
- On the homepage of Control Center, click .
- Click Keyboard Layout.
- Click Edit.
- Click to delete keyboard layout.
Switch Keyboard Layout
- On the homepage of Control Center, click .
- Click Keyboard Layout.
- Click the layout you want to switch to.
- After successful switching, the layout will be marked with a check.
System Language
The system language is the language you selected when you installed the system by default, which can be changed at any time.
Add System Language
Add multiple languages into the list to change language conveniently.
- On the homepage of Control Center, click .
- Click System Language.
- Click to enter the language list.
- Select the language you want, and it will be added into system language list automatically.
Change System Language
- On the homepage of Control Center, click .
- Click System Language.
- Select the language you want to switch to, and the language package will be installed automatically.
- After being successfully installed, log out and log in again to view the changes.
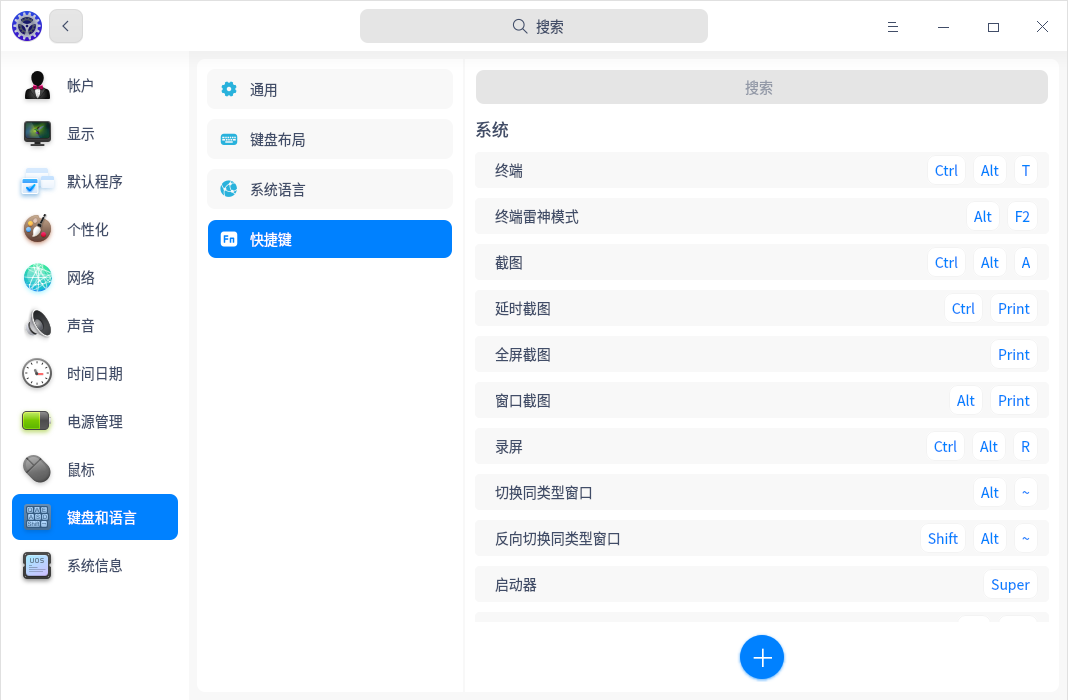
Shortcuts
The shortcut list includes all shortcuts in the system. View, modify and customize the shortcuts here as you want.
View Shortcuts
- On the homepage of Control Center, click .
- Click Shortcuts.
- You can search or view the default shortcuts for system, window and workspace.
Modify Shortcuts
- On the homepage of Control Center, click .
- Click Shortcuts.
- Click the shortcut you want to modify.
- Press new shortcut to change it.
on the keyboard. To cancel modifying, press Esc or click Restore Defaults at the bottom.
Customize Shortcuts
- On the homepage of Control Center, click .
- Click Shortcuts.
- Click .
- Enter the name, command and shortcut.
- Click Add.
- After being successfully added, click Edit.
- Click to delete the custom shortcut.
System Info
You can view system version, authorization info, hardware info, and the agreements here.
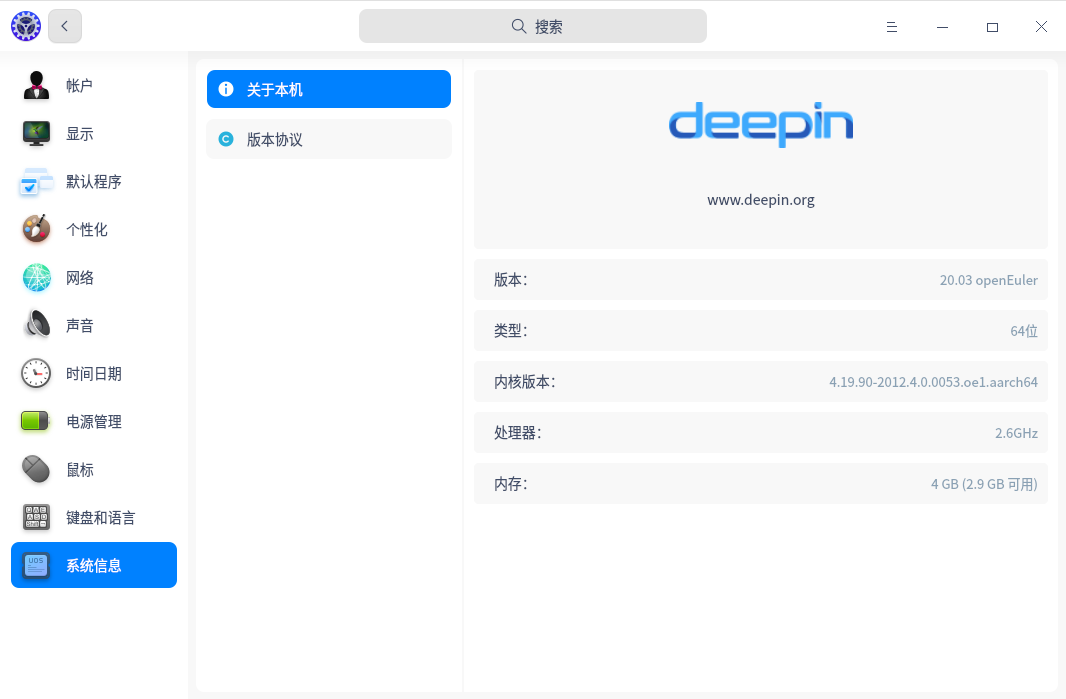
About This PC
- On the homepage of Control Center, click
 .
. - Under About This PC, you can view system version, authorization and hardware information.
- If the system has not been activated, click Activate to activate the system.
Edition License
- On the homepage of Control Center, click .
- View the system edition license under Edition License.
End User License Agreement
- On the homepage of Control Center, click .
- View the End User License Agreement under End User License Agreement.
Keyboard Interaction
You can use the keyboard to switch between various interface areas, select objects and perform operations.
| Key | Function |
|---|---|
| Tab | Switch between different areas or dialog buttons. |
    | Used to select different objects in the same area. Press to enter the lower menu and to return to the upper menu. Pressand to switch between up and down. |
| Enter | Execute the selected operation. |
| Space | Preview the selected object in File Manager; start and pause the playback in Music and Movie; expand the drop-down options in the drop-down list (The enter key is also available.). |
| Ctrl + M | Open the right-click menu. |