Installing, Deploying, and Using HA

Installation and Configuration

  • Environment preparation: At least two physical machines or VMs with openEuler 20.03 LTS SP2 installed are required. (This section uses two physical machines or VMs as an example.) For details, see the openEuler 20.03 LTS SP2 Installation Guide.

Modifying the Host Name and the /etc/hosts File

  • Note: You need to perform the following operations on both hosts. The following takes the operation on one host as an example.

Before using the HA software, ensure that the host name has been changed and all host names have been written into the /etc/hosts file.

  • Run the following command to change the host name:
# hostnamectl set-hostname ha1
  • Edit the /etc/hosts file and write the following fields:
172.30.30.65 ha1
172.30.30.66 ha2

Configuring the Yum Source

After the system is successfully installed, the Yum source is configured by default. The file location information is stored in the /etc/yum.repos.d/openEuler.repo file. The HA software package uses the following sources:

[OS]
name=OS
baseurl=http://repo.openeuler.org/openEuler-20.03-LTS-SP2/OS/$basearch/
enabled=1
gpgcheck=1
gpgkey=http://repo.openeuler.org/openEuler-20.03-LTS-SP2/OS/$basearch/RPM-GPG-KEY-openEuler

[everything]
name=everything
baseurl=http://repo.openeuler.org/openEuler-20.03-LTS-SP2/everything/$basearch/
enabled=1
gpgcheck=1
gpgkey=http://repo.openeuler.org/openEuler-20.03-LTS-SP2/everything/$basearch/RPM-GPG-KEY-openEuler

[EPOL]
name=EPOL
baseurl=http://repo.openeuler.org/openEuler-20.03-LTS-SP2/EPOL/$basearch/
enabled=1
gpgcheck=1
gpgkey=http://repo.openeuler.org/openEuler-20.03-LTS-SP2/OS/$basearch/RPM-GPG-KEY-openEuler

Installing HA Software Package Components

# yum install corosync pacemaker pcs fence-agents fence-virt corosync-qdevice sbd drbd drbd-utils -y

Setting the hacluster User Password

# passwd hacluster

Modifying the /etc/corosync/corosync.conf File

totem {
        version: 2
        cluster_name: hacluster
         crypto_cipher: none
        crypto_hash: none
}
logging {         
        fileline: off
        to_stderr: yes
        to_logfile: yes
        logfile: /var/log/cluster/corosync.log
        to_syslog: yes
        debug: on
       logger_subsys {
               subsys: QUORUM
               debug: on
        }
}
quorum {
           provider: corosync_votequorum
           expected_votes: 2
           two_node: 1
       }
nodelist {
       node {
               name: ha1
               nodeid: 1
               ring0_addr: 172.30.30.65
               }
        node {
               name: ha2
               nodeid: 2
               ring0_addr: 172.30.30.66
               }
        }

Managing Services

Disabling the Firewall

# systemctl stop firewalld

Change the status of SELINUX in the /etc/selinux/config file to disabled.

# SELINUX=disabled

Managing the pcs Service

  • Run the following command to start the pcs service:
# systemctl start pcsd
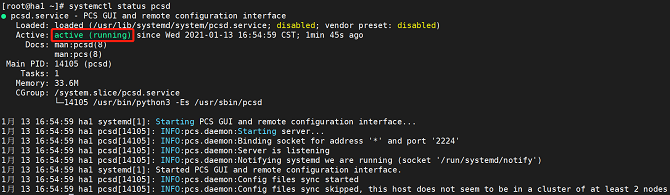
  • Run the following command to query service status:
# systemctl status pcsd

The service is started successfully if the following information is displayed:

Managing the pacemaker Service

  • Run the following command to start the pacemaker service:
# systemctl start pacemaker
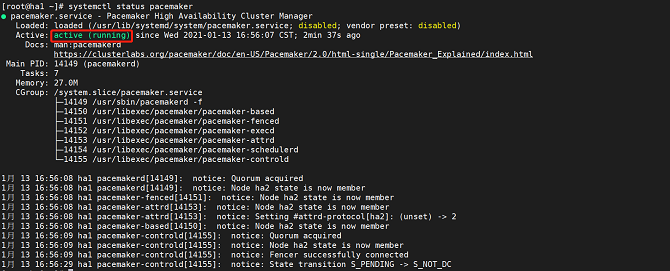
  • Run the following command to query service status:
# systemctl status pacemaker

The service is started successfully if the following information is displayed:

Managing the corosync Service

  • Run the following command to start the corosync service:
# systemctl start corosync
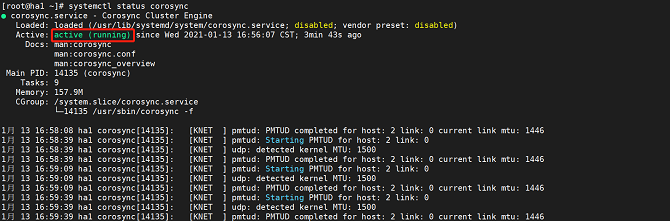
  • Run the following command to query service status:
# systemctl status corosync

The service is started successfully if the following information is displayed:

Performing Node Authentication

  • Note: Perform this operation on only one node.
# pcs host auth ha1 ha2

Accessing the Front-End Management Platform

After the preceding services are started, open the browser (Chrome or Firefox is recommended) and enter https://IP:2224 in the address box.

Quick User Guide

Login Page

The username is hacluster and the password is the one set on the host.

Home Page

The home page is the MANAGE CLUSTERS page, which includes four functions: remove, add existing, destroy, and create new clusters.

Managing Nodes

Node

You can add and remove nodes. The following describes how to add an existing node.

Node management includes the following functions: start, stop, restart, standby, maintenance, and configure Fencing. You can view the enabled services and running resources of the node and manage the node.

Preference Setting

You can perform the following operations using command lines. The following is a simple example. Run the pcs --help command to query more commands available.

# pcs property set stonith-enabled=false
# pcs property set no-quorum-policy=ignore

Run the pcs property command to view all settings.

  • Change the default status of No Quorum Policy to ignore, and the default status of Stonith Enabled to false, as shown in the following figure:

Adding Resources

Adding Common Resources

The multi-option drop-down list box in the system supports keyword matching. You can enter the keyword of the item to be configured and quickly select it.

Apache and IPaddr are used as examples.

Run the following commands to add the Apache and IPaddr resources:

# pcs resource create httpd ocf:heartbeat:apache
# pcs resource create IPaddr ocf:heartbeat:IPaddr2 ip=172.30.30.67

Run the following command to check the cluster resource status:

# pcs status

  • Add Apache resources.

  • The resources are successfully added if the following information is displayed:

  • The resources are created and started successfully, and run on a node, for example, ha1. The Apache page is displayed.

  • Add IPaddr resources.

  • The resources are successfully added if the following information is displayed:

  • The resources are created and started successfully, and run on a node, for example, ha1. The HA web login page is displayed, and you can log in to the page and perform operations. When the resources are switched to ha2, the web page can still be accessed.

Adding Group Resources

When you add group resources, at least one common resource is needed in the cluster. Select one or more resources and click Create Group.

  • Note: Group resources are started in the sequence of subresources. Therefore, you need to select subresources in sequence.

The resources are successfully added if the following information is displayed:

Adding Clone Resources

The resources are successfully added if the following information is displayed:

Editing Resources

  • Enable: Select a target resource that is not running from the resource node list. Enable the resource.
  • Disable: Select a target resource that is running from the resource node list. Disable the resource.
  • Clearup: Select a target resource from the resource node list and clear the resource.
  • Porting: Select a target resource from the resource node list. The resource must be a common resource or group resource that is running. You can port the resource to a specified node.
  • Rollback: Select a target resource from the resource node list. Before rolling back a resource, ensure that the resource has been ported. You can clear the porting settings of the resource and roll the resource back to the original node. After you click the button, the status of the resource item in the list is the same as that when the resource is enabled.
  • Remove: Select a target resource from the resource node list and remove the resource.

You can perform the preceding resource operations on the page shown in the following figure:

Setting Resource Relationships

The resource relationship is used to set restrictions for target resources. Resource restrictions are classified as follows: resource location, resource colocation, and resource ordering.

  • Resource location: Set the runlevel of nodes in the cluster to determine the node where the resource runs during startup or switchover. The runlevels are Master and Slave in descending order.
  • Resource colocation: Indicate whether the target resource and other resources in the cluster are running on the same node. For resources on the same node, the resource must run on the same node as the target resource. For resources on mutually exclusive nodes, the resource and the target resource must run on different nodes.
  • Resource ordering: Set the ordering in which the target resource and other resources in the cluster are started. The preamble resource must run before the target resource runs. The postamble resource can run only after the target resource runs.

After adding common resources or group resources, you can perform the preceding resource operations on the page shown in the following figure:

ACLS

ACLS is an access control list. You can click Add to add a user and manage the user access.

Bug Catching

Buggy Content

Bug Description

Submit As Issue

It's a little complicated....

I'd like to ask someone.

PR

Just a small problem.

I can fix it online!

Bug Type
Specifications and Common Mistakes

● Misspellings or punctuation mistakes;

● Incorrect links, empty cells, or wrong formats;

● Chinese characters in English context;

● Minor inconsistencies between the UI and descriptions;

● Low writing fluency that does not affect understanding;

● Incorrect version numbers, including software package names and version numbers on the UI.

Usability

● Incorrect or missing key steps;

● Missing prerequisites or precautions;

● Ambiguous figures, tables, or texts;

● Unclear logic, such as missing classifications, items, and steps.

Correctness

● Technical principles, function descriptions, or specifications inconsistent with those of the software;

● Incorrect schematic or architecture diagrams;

● Incorrect commands or command parameters;

● Incorrect code;

● Commands inconsistent with the functions;

● Wrong screenshots.

Risk Warnings

● Lack of risk warnings for operations that may damage the system or important data.

Content Compliance

● Contents that may violate applicable laws and regulations or geo-cultural context-sensitive words and expressions;

● Copyright infringement.

How satisfied are you with this document

Not satisfied at all
Very satisfied
Submit
Click to create an issue. An issue template will be automatically generated based on your feedback.