Installing and Deploying HA
This chapter describes how to install and deploy an HA cluster.
- Installing and Deploying HA
- Installation and Deployment
Installation and Deployment
- Prepare the environment: At least two physical machines or VMs with openEuler 20.03 LTS SP3 installed are required. (This section uses two physical machines or VMs as an example.) For details about how to install openEuler 20.03 LTS SP3, see the openEuler 20.03 LTS SP3 Installation Guide.
Modifying the Host Name and the /etc/hosts File
- Note: You need to perform the following operations on both hosts. The following takes one host as an example.
Before using the HA software, ensure that all host names have been changed and written into the /etc/hosts file.
- Change the host name:
hostnamectl set-hostname ha1
- Edit the /etc/hosts file and write the following fields:
172.30.30.65 ha1
172.30.30.66 ha2
Configuring the Yum Repository
After the system is successfully installed, the Yum source is configured by default. The file location is stored in the /etc/yum.repos.d/openEuler.repo file. The HA software package uses the following sources:
[OS]
name=OS
baseurl=http://repo.openeuler.org/openEuler-20.03-LTS-SP3/OS/$basearch/
enabled=1
gpgcheck=1
gpgkey=http://repo.openeuler.org/openEuler-20.03-LTS-SP3/OS/$basearch/RPM-GPG-KEY-openEuler

[everything]
name=everything
baseurl=http://repo.openeuler.org/openEuler-20.03-LTS-SP3/everything/$basearch/
enabled=1
gpgcheck=1
gpgkey=http://repo.openeuler.org/openEuler-20.03-LTS-SP3/everything/$basearch/RPM-GPG-KEY-openEuler

[EPOL]
name=EPOL
baseurl=http://repo.openeuler.org/openEuler-20.03-LTS-SP3/EPOL/$basearch/
enabled=1
gpgcheck=1
gpgkey=http://repo.openeuler.org/openEuler-20.03-LTS-SP3/OS/$basearch/RPM-GPG-KEY-openEuler
Installing the HA Software Package Components
yum install -y corosync pacemaker pcs fence-agents fence-virt corosync-qdevice sbd drbd drbd-utils
Setting the hacluster User Password
passwd hacluster
Modifying the /etc/corosync/corosync.conf File
totem {
        version: 2
        cluster_name: hacluster
         crypto_cipher: none
        crypto_hash: none
}
logging {
        fileline: off
        to_stderr: yes
        to_logfile: yes
        logfile: /var/log/cluster/corosync.log
        to_syslog: yes
        debug: on
       logger_subsys {
               subsys: QUORUM
               debug: on
        }
}
quorum {
           provider: corosync_votequorum
           expected_votes: 2
           two_node: 1
       }
nodelist {
       node {
               name: ha1
               nodeid: 1
               ring0_addr: 172.30.30.65
               }
        node {
               name: ha2
               nodeid: 2
               ring0_addr: 172.30.30.66
               }
        }
Managing the Services
Disabling the firewall
systemctl stop firewalld
Change the status of SELINUX in the /etc/selinux/config file to disabled.
# SELINUX=disabled
Restart the system to ensure that the SELINUX settings take effect.
reboot
Managing the pcs service
- Start the pcs service:
systemctl start pcsd
- Enable the pcs service to start upon system startup:
systemctl enable pcsd
- Query the pcs service status:
systemctl status pcsd
The service is started successfully if the following information is displayed:

Managing the Pacemaker service
- Start the Pacemaker service:
systemctl start pacemaker
- Query the Pacemaker service status:
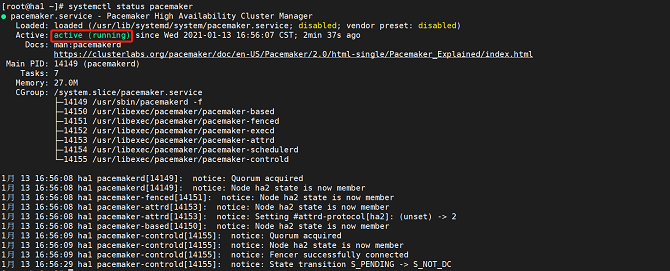
systemctl status pacemaker
The service is started successfully if the following information is displayed:

Managing the Corosync service
- Start the Corosync service:
systemctl start corosync
- Query the Corosync service status:
systemctl status corosync
The service is started successfully if the following information is displayed:

Performing Node Authentication
- Note: Run this command on only one node. Authorize the user name and password oof each node using pcs.
$ pcs host auth ha1 ha2
Username: hacluster
Password:
ha1: Authorized
ha2: Authorized
Accessing the Front-End Management Platform
After the preceding services are started, open the browser (Chrome or Firefox is recommended) and enter https://localhost:2224 in the navigation bar.
- This page is the native management platform.

For details about how to install the management platform newly developed by the community, see https://gitee.com/openeuler/ha-api/blob/master/docs/build.md.
- The following is the management platform newly developed by the community.

- The next chapter describes how to quickly use an HA cluster and add an instance. For details, see the HA Usage Example.


