KubeEdge Usage Guide
KubeEdge extends the capabilities of Kubernetes to edge scenarios and provides infrastructure support for the network, application deployment, and metadata synchronization between the cloud and the edge. The usage of KubeEdge is the same as that of Kubernetes. In addition, KubeEdge supports the management and control of edge devices. The following example describes how to use KubeEdge to implement edge-cloud synergy.
1. Preparations
Example: KubeEdge Counter Demo
The counter is a pseudo device. You can run this demo without any additional physical devices. The counter runs on the edge side. You can use the web interface on the cloud side to control the counter and get the counter value.
For details, see https://github.com/kubeedge/examples/tree/master/kubeedge-counter-demo.
1) This demo requires the KubeEdge v1.2.1 or later. In this example, the latest KubeEdge v1.8.0 is used.
$ kubectl get node
NAME       STATUS   ROLES        AGE   VERSION
ke-cloud   Ready    master       13h   v1.20.2
ke-edge1   Ready    agent,edge   64s   v1.19.3-kubeedge-v1.8.0

Note: In this document, the edge node ke-edge1 is used for verification. If you perform verification by referring to this document, you need to change the edge node name based on your actual deployment.
2) Ensure that the following configuration items are enabled for the Kubernetes API server:
--insecuret-port=8080
--insecure-bind-address=0.0.0.0
You can modify the /etc/kubernetes/manifests/kube-apiserver.yaml file, and then restart the Pod of the Kubernetes API server component to make the modifications take effect.
3) Install the Go language.
[root@ke-cloud ~]# wget https://golang.google.cn/dl/go1.14.4.linux-amd64.tar.gz
[root@ke-cloud ~]# tar -zxvf go1.14.4.linux-amd64.tar.gz -C /usr/local
4) Configure the Go environment.
[root@ke-cloud ~]# vim /etc/profileAdd the following to the end of the file:
export GOROOT=/usr/local/go
export GOPATH=/data/gopath
export PATH=$PATH:$GOROOT/bin:$GOPATH/bin
5) Apply the modifications.
[root@ke-cloud ~]# source /etc/profile
[root@ke-cloud ~]# mkdir -p /data/gopath && cd /data/gopath
[root@ke-cloud ~]# mkdir -p src pkg bin
6) Download the sample code:
git clone https://github.com/kubeedge/examples.git $GOPATH/src/github.com/kubeedge/examples2. Creating the Device Model and Device
1) Create the device model.
cd $GOPATH/src/github.com/kubeedge/examples/kubeedge-counter-demo/crds
kubectl create -f kubeedge-counter-model.yaml
2) Create the device.
Modify matchExpressions as required.
$ cd $GOPATH/src/github.com/kubeedge/examples/kubeedge-counter-demo/crds
$ vim kubeedge-counter-instance.yaml
apiVersion: devices.kubeedge.io/v1alpha1
kind: Device
metadata:
  name: counter
  labels:
    description: 'counter'
    manufacturer: 'test'
spec:
  deviceModelRef:
    name: counter-model
  nodeSelector:
    nodeSelectorTerms:
    - matchExpressions:
      - key: 'kubernetes.io/hostname'
        operator: In
        values:
        - ke-edge1

status:
  twins:
    - propertyName: status
      desired:
        metadata:
          type: string
        value: 'OFF'
      reported:
        metadata:
          type: string
        value: '0'

$ kubectl create -f kubeedge-counter-instance.yaml
3. Deploying the Cloud Application
1) Modify the code.
The cloud application web-controller-app controls the edge application pi-counter-app. The default listening port of the cloud application is 80. Change the port number to 8089.
$ cd $GOPATH/src/github.com/kubeedge/examples/kubeedge-counter-demo/web-controller-app
$ vim main.go
package main

import (
        "github.com/astaxie/beego"
        "github.com/kubeedge/examples/kubeedge-counter-demo/web-controller-app/controller"
)

func main() {
        beego.Router("/", new(controllers.TrackController), "get:Index")
        beego.Router("/track/control/:trackId", new(controllers.TrackController), "get,post:ControlTrack")

        beego.Run(":8089")
}
2) Build the image.
Note: When building the image, copy the source code to the path specified by GOPATH. Disable Go modules if they are enabled.
make all
make docker
3) Deploy web-controller-app.
cd $GOPATH/src/github.com/kubeedge/examples/kubeedge-counter-demo/crds
kubectl apply -f kubeedge-web-controller-app.yaml
4. Deploying the Edge Application
The pi-counter-app application on the edge is controlled by the cloud application. The edge application communicates with the MQTT server to perform simple counting.
1) Modify the code and build the image.
Change the value of GOARCH to amd64 in Makefile to run the container.
$ cd $GOPATH/src/github.com/kubeedge/examples/kubeedge-counter-demo/counter-mapper
$ vim Makefile
.PHONY: all pi-execute-app docker clean
all: pi-execute-app

pi-execute-app:
        GOARCH=amd64 go build -o pi-counter-app main.go

docker:
        docker build . -t kubeedge/kubeedge-pi-counter:v1.0.0

clean:
        rm -f pi-counter-app

$ make all
$ make docker
2) Deploy pi-counter-app.
$ cd $GOPATH/src/github.com/kubeedge/examples/kubeedge-counter-demo/crds
$ kubectl apply -f kubeedge-pi-counter-app.yaml

Note: To prevent Pod deployment from being stuck at `ContainerCreating`, run the docker save, scp, and docker load commands to release the image to the edge.

$ docker save -o kubeedge-pi-counter.tar kubeedge/kubeedge-pi-counter:v1.0.0
$ scp kubeedge-pi-counter.tar root@192.168.1.56:/root
$ docker load -i kubeedge-pi-counter.tar
5. Trying the Demo
Now, the KubeEdge Demo is deployed on the cloud and edge as follows:
$ kubectl get pods -o wide
NAME                                    READY   STATUS    RESTARTS   AGE     IP             NODE       NOMINATED NODE   READINESS GATES
kubeedge-counter-app-758b9b4ffd-f8qjj   1/1     Running   0          26m     192.168.1.66   ke-cloud   <none>           <none>
kubeedge-pi-counter-c69698d6-rb4xz      1/1     Running   0          2m      192.168.1.56   ke-edge1   <none>           <none>
Let's test the running effect of the Demo.
1) Execute the ON command. On the web page, select ON and click Execute. You can run the following command on the edge node to view the execution result:
docker logs -f counter-container-id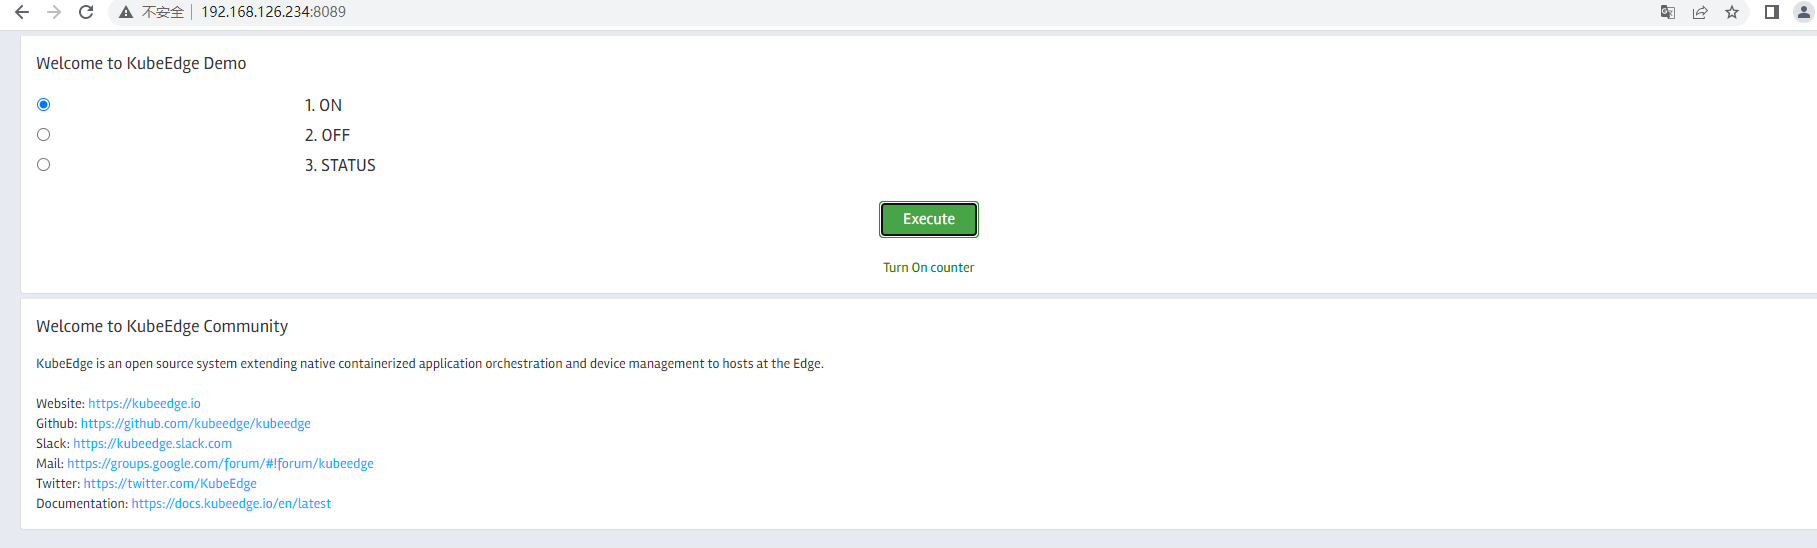 /figures/en-us_image_1706077646.png
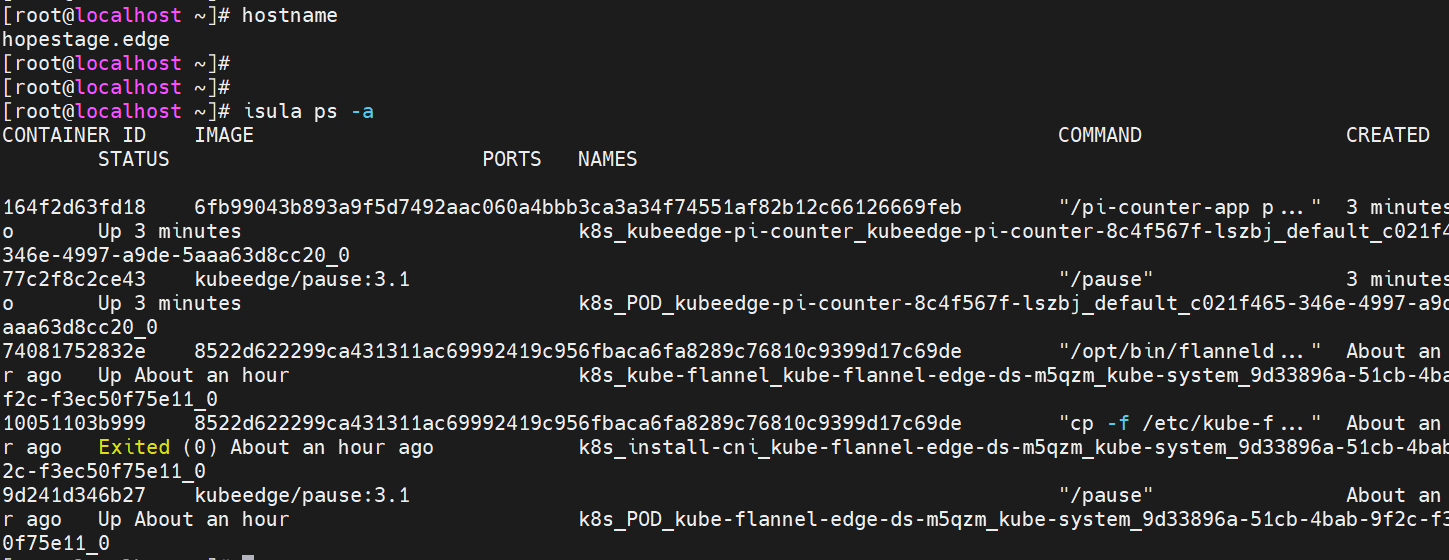
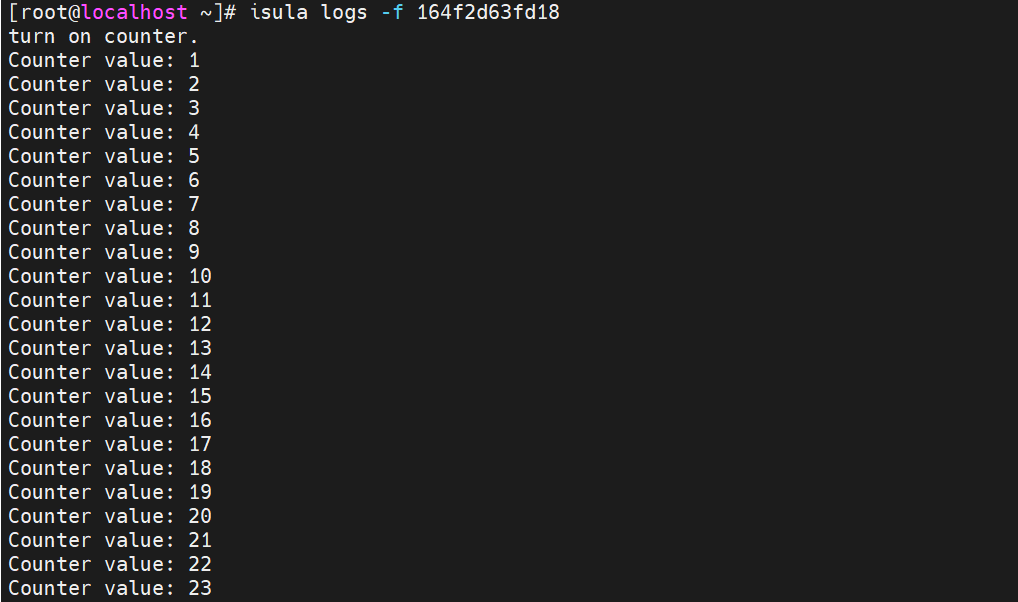
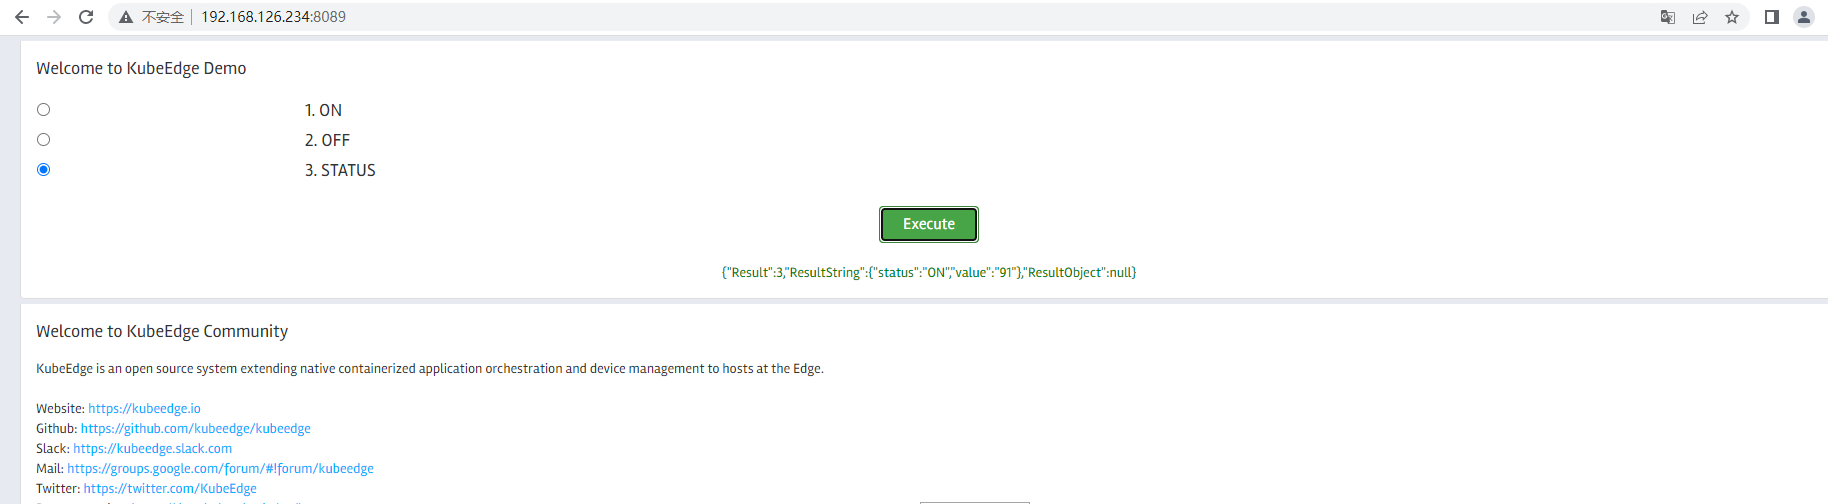
2) Check the counter's STATUS. On the web page, select STATUS and click Execute. The current counter status is displayed on the web page.
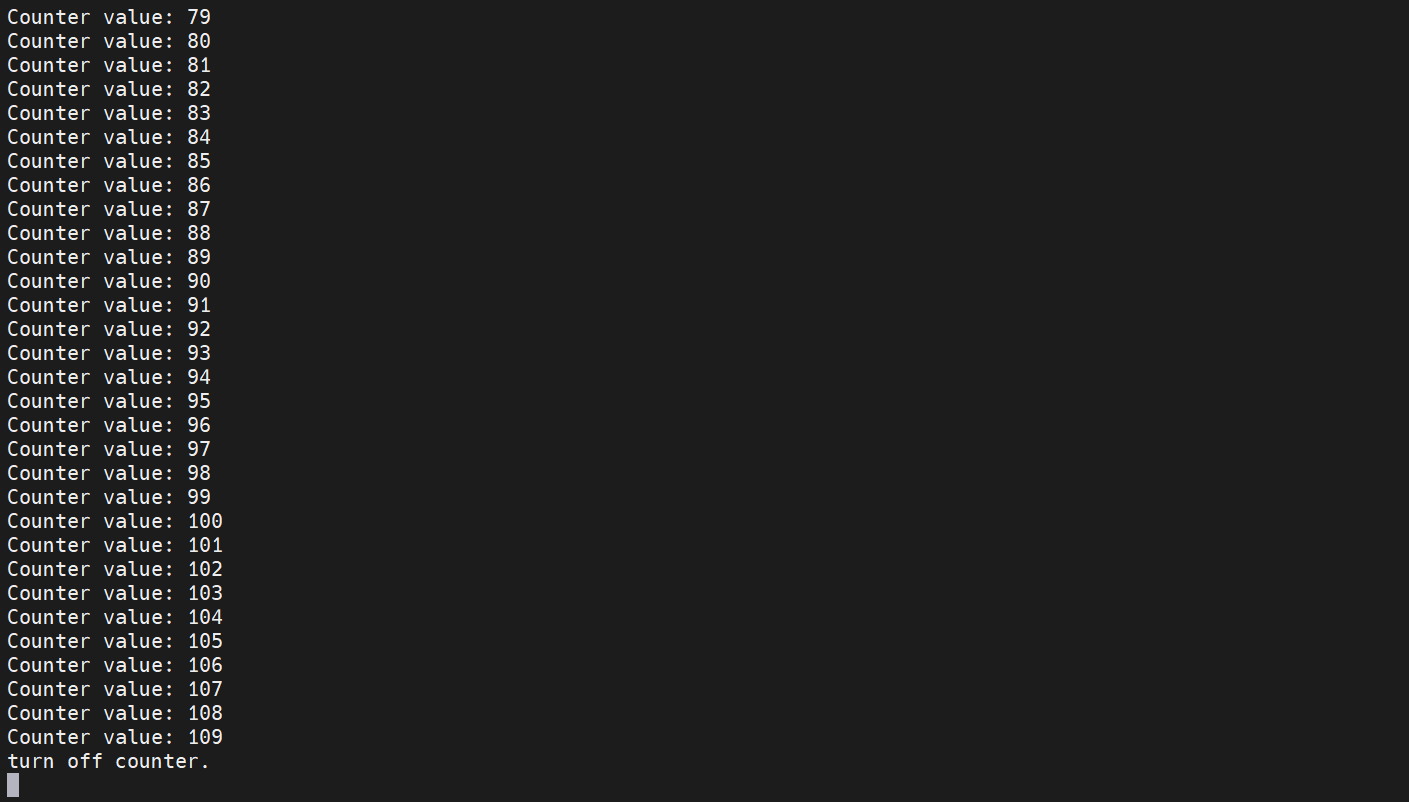
3) Execute the OFF command. On the web page, select OFF and click Execute. You can run the following command on the edge node to view the execution result:
docker logs -f counter-container-id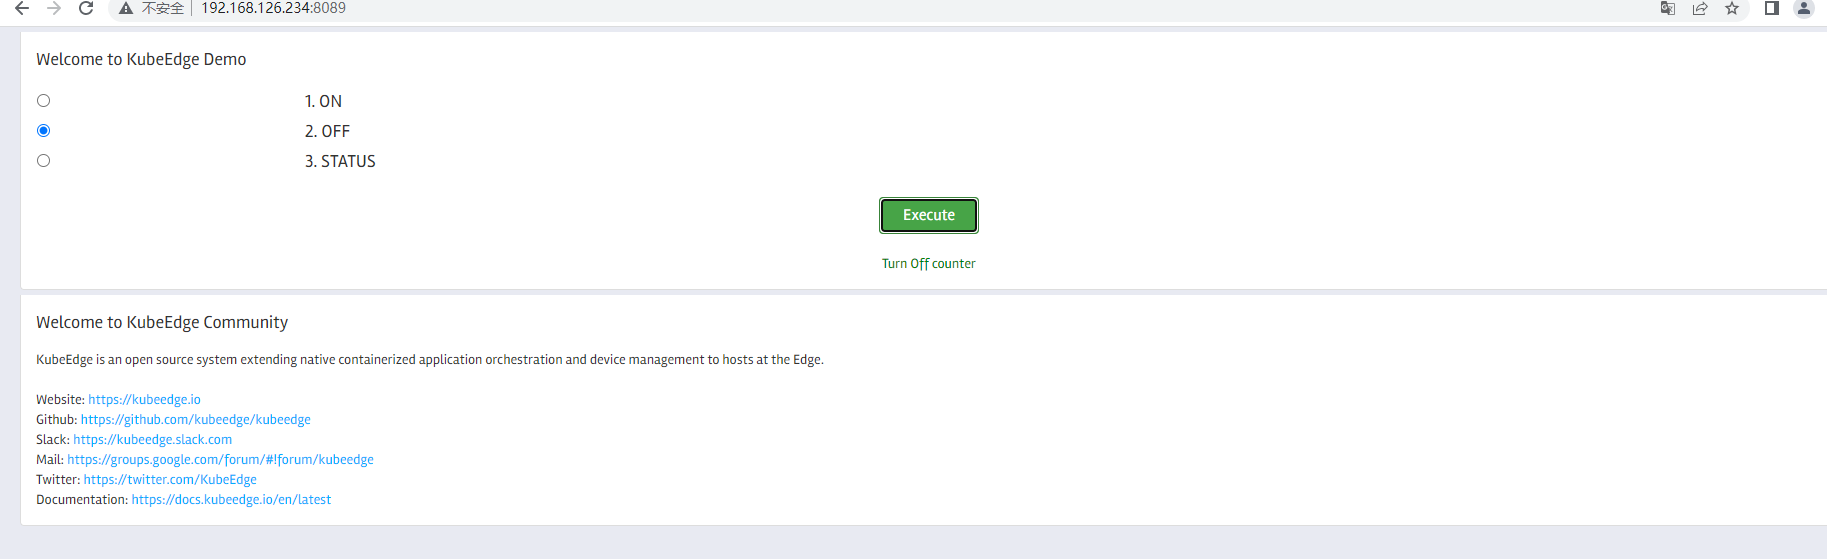
6. Others
1) For more official KubeEdge examples, visit https://github.com/kubeedge/examples.
| Name | Description |
|---|---|
| LED-RaspBerry-Pi | Controlling a LED light with Raspberry Pi using KubeEdge platform |
| Data Analysis @ Edge | Analyzing data at edge by using Apache Beam and KubeEdge |
| Security@Edge | Security at edge using SPIRE for identity management |
| Bluetooth-CC2650-demo | Controlling a CC2650 SensorTag bluetooth device using KubeEdge platform |
| Play Music @Edge through WeChat | Play music at edge based on WeChat and KubeEdge |
| Play Music @Edge through Web | Play music at edge based on Web and KubeEdge |
| Collecting temperature @Edge | Collecting temperature at edge based KubeEdge |
| Control pseudo device counter and collect data | Control pseudo device counter and collect data based KubeEdge |
| Play Music @Edge through Twitter | Play music at edge based on Twitter and KubeEdge. |
| Control Zigbee @Edge through cloud | Object detection at cloud using OpenCV and using it to control zigbee on edge using Kubeedge. |
2) Use EdgeMesh to discover edge services.
https://github.com/kubeedge/edgemesh
3) Customize the cloud-edge message route.
https://kubeedge.io/en/docs/developer/custom_message_deliver/
版权所有 © 2026 openEuler 保留一切权利
京ICP备2020036654号-1
京公网安备 11030102011597 号