Using Kickstart for Automatic Installation
Introduction
Overview
You can use the kickstart tool to automatically install the openEuler OS in either of the following ways:
- Semi-automatic installation: You only need to specify the location of the kickstart file. Kickstart automatically configures OS attributes such as keyboard, language, and partitions.
- Automatic installation: The OS is automatically installed.
Advantages and Disadvantages
Table 1 lists the advantages and disadvantages of semi-automatic installation and full-automatic installation using kickstart. You can select an installation mode as required.
Table 1 Advantages and disadvantages
Services such as TFTP, PXE, and DHCP do not need to be prepared. | You need to manually specify the path of the kickstart file. | |
Services, such as TFTP, DHCPD, and PXE, need to be configured. |
Background
Kickstart
Kickstart is an unattended installation mode. The principle of kickstart is to record typical parameters that need to be manually entered during the installation and generate the configuration file ks.cfg. During the installation, the installation program searches the ks.cfg configuration file first for required parameters. If no matching parameters are found, you need to manually configure these parameters. If all required parameters are covered by the kickstart file, automatic installation can be achieved by only specifying the path of the kickstart file.
Both full-automatic or semi-automatic installation can be achieved by kickstart.
PXE
Pre-boot Execution Environment (PXE)) works in client/server network mode. The PXE client can obtain an IP address from the DHCP server during the startup and implement client boot and installation through the network based on protocols such as trivial file transfer protocol (TFTP).
TFTP
TFTP is used to transfer simple and trivial files between clients and the server.
Semi-automatic Installation Guide
Environment Requirements
The environment requirements for semi-automatic installation of openEuler OS using kickstart are as follows:
- PM/VM (For details about how to create VMs, see the documents from corresponding vendors): includes the computer where kickstart is used for automatic installation and the computer where the kickstart tool is installed.
- Httpd: stores the kickstart file.
- ISO: openEuler-21.09-aarch64-dvd.iso
Procedure
To use kickstart to perform semi-automatic installation of openEuler, perform the following steps:
Environment Preparation
NOTE
Before the installation, ensure that the firewall of the HTTP server is disabled. Run the following command to disable the firewall:
iptables -FInstall httpd and start the service.
shell# dnf install httpd -y # systemctl start httpd # systemctl enable httpdRun the following commands to prepare the kickstart file:
shell# mkdir /var/www/html/ks #vim /var/www/html/ks/openEuler-ks.cfg ===>The file can be obtained by modifying the **anaconda-ks.cfg** file automatically generated from openEuler OS. ==================================== ***Modify the following information as required.*** #version=DEVEL ignoredisk --only-use=sda autopart --type=lvm # Partition clearing information clearpart --none --initlabel # Use graphical install graphical # Use CDROM installation media cdrom # Keyboard layouts keyboard --vckeymap=cn --xlayouts='cn' # System language lang zh_CN.UTF-8 # Network information network --bootproto=dhcp --device=enp4s0 --ipv6=auto --activate network --hostname=openeuler.com # Root password rootpw --iscrypted $6$fQE83lxEZ48Or4zc$j7/PlUMHn29yTjCD4Fi44WTZL/RzVGxJ/7MGsZMl6QfE3KjIVT7M4UrhFXbafvRq2lUddAFcyWHd5WRmXfEK20 # Run the Setup Agent on first boot firstboot --enable # Do not configure the X Window System skipx # System services services --disabled="chronyd" # System timezone timezone Asia/Shanghai --utc --nontp %packages @^minimal-environment @standard %end %anaconda pwpolicy root --minlen=8 --minquality=1 --notstrict --nochanges --notempty pwpolicy user --minlen=8 --minquality=1 --notstrict --nochanges --emptyok pwpolicy luks --minlen=8 --minquality=1 --notstrict --nochanges --notempty %end %post #enable kdump sed -i "s/ ro / ro crashkernel=1024M,high /" /boot/efi/EFI/openEuler/grub.cfg %end =====================================NOTE
The method of generating the password ciphertext is as follows:
python# python3 Python 3.7.0 (default, Apr 1 2019, 00:00:00) [GCC 7.3.0] on linux Type "help", "copyright", "credits" or "license" for more information. >>> import crypt >>> passwd = crypt.crypt("myPasswd") >>> print (passwd) $6$63c4tDmQGn5SDayV$mZoZC4pa9Jdt6/ALgaaDq6mIExiOO2EjzomB.Rf6V1BkEMJDcMddZeGdp17cMyc9l9ML9ldthytBEPVcnboR/0Mount the ISO image file to the CD-ROM drive of the computer where openEuler is to be installed.
If you want to install openEuler through the NFS, specify the path (which is cdrom by default) of installation source in the kickstart file.
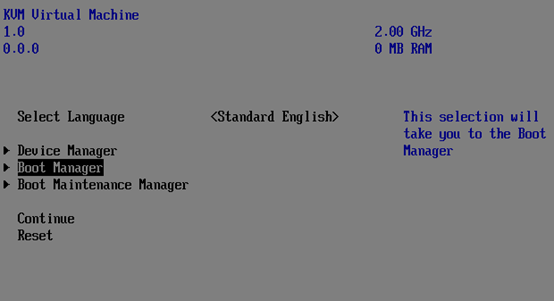
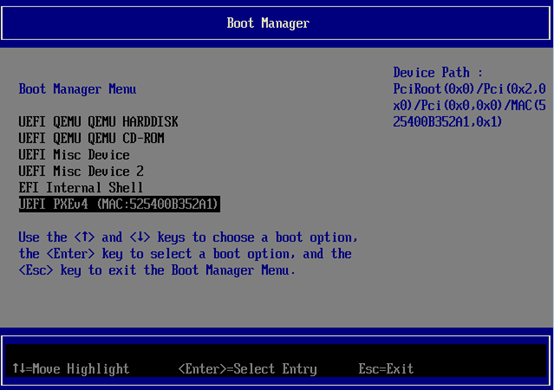
Installing the System
The installation selection dialog box is displayed.
On the installation wizard page in Starting the Installation, select Install openEuler 21.09 and press e.
Add inst.ks=http://server_ip/ks/openEuler-ks.cfg to the startup parameters.

Press Ctrl+x to start the automatic installation.
Verify that the installation is complete.
After the installation is complete, the system automatically reboots. If the first boot option of the system is set to the CD_ROM, the installation page is displayed again. Shut down the computer and change startup option to start from the hard disk preferentially.

Full-automatic Installation Guide
Environment Requirements
The environment requirements for full-automatic installation of openEuler using kickstart are as follows:
- PM/VM (For details about how to create VMs, see the documents from corresponding vendors): includes the computer where kickstart is used for automatic installation and the computer where the kickstart tool is installed.
- Httpd: stores the kickstart file.
- TFTP: provides vmlinuz and initrd files.
- DHCPD/PXE: provides the DHCP service.
- ISO: openEuler-21.09-aarch64-dvd.iso
Procedure
To use kickstart to perform full-automatic installation of openEuler, perform the following steps:
Environment Preparation
NOTE
Before the installation, ensure that the firewall of the HTTP server is disabled. Run the following command to disable the firewall:
iptables -FInstall httpd and start the service.
shell# dnf install httpd -y # systemctl start httpd # systemctl enable httpdInstall and configure TFTP.
shell# dnf install tftp-server -y # vim /etc/xinetd.d/tftp service tftp { socket_type = dgram protocol = udp wait = yes user = root server = /usr/sbin/in.tftpd server_args = -s /var/lib/tftpboot disable = no per_source = 11 cps = 100 2 flags = IPv4 } # systemctl start tftp # systemctl enable tftp # systemctl start xinetd # systemctl status xinetd # systemctl enable xinetdPrepare the installation source.
shell# mount openEuler-21.09-aarch64-dvd.iso /mnt # cp -r /mnt/* /var/www/html/openEuler/Set and modify the kickstart configuration file openEuler-ks.cfg. Select the HTTP installation source by referring to 3.
shell#vim /var/www/html/ks/openEuler-ks.cfg ==================================== ***Modify the following information as required.*** #version=DEVEL ignoredisk --only-use=sda autopart --type=lvm # Partition clearing information clearpart --none --initlabel # Use graphical install graphical # Keyboard layouts keyboard --vckeymap=cn --xlayouts='cn' # System language lang zh_CN.UTF-8 #Use http installation source url --url=//192.168.122.1/openEuler/ %post #enable kdump sed -i "s/ ro / ro crashkernel=1024M,high /" /boot/efi/EFI/openEuler/grub.cfg %end ...Modify the PXE configuration file grub.cfg as follows. (Note: Currently, openEuler does not support the cfg file in bls format.)
shell# cp -r /mnt/images/pxeboot/* /var/lib/tftpboot/ # cp /mnt/EFI/BOOT/grubaa64.efi /var/lib/tftpboot/ # cp /mnt/EFI/BOOT/grub.cfg /var/lib/tftpboot/ # ls /var/lib/tftpboot/ grubaa64.efi grub.cfg initrd.img TRANS.TBL vmlinuz # vim /var/lib/tftpboot/grub.cfg set default="1" function load_video { if [ x$feature_all_video_module = xy ]; then insmod all_video else insmod efi_gop insmod efi_uga insmod ieee1275_fb insmod vbe insmod vga insmod video_bochs insmod video_cirrus fi } load_video set gfxpayload=keep insmod gzio insmod part_gpt insmod ext2 set timeout=60 ### BEGIN /etc/grub.d/10_linux ### menuentry 'Install openEuler 21.03 ' --class red --class gnu-linux --class gnu --class os { set root=(tftp,192.168.1.1) linux /vmlinuz ro inst.geoloc=0 console=ttyAMA0 console=tty0 rd.iscsi.waitnet=0 inst.ks=http://192.168.122.1/ks/openEuler-ks.cfg initrd /initrd.img }Configure DHCP (which can be replaced by DNSmasq).
shell# dnf install dhcp -y # # DHCP Server Configuration file. # see /usr/share/doc/dhcp-server/dhcpd.conf.example # see dhcpd.conf(5) man page # # vim /etc/dhcp/dhcpd.conf ddns-update-style interim; ignore client-updates; filename "grubaa64.efi"; # location of the pxelinux startup file; next-server 192.168.122.1; # (IMPORTANT) IP address of the TFTP server; subnet 192.168.122.0 netmask 255.255.255.0 { option routers 192.168.111.1; # Gateway address option subnet-mask 255.255.255.0; # Subnet mask range dynamic-bootp 192.168.122.50 192.168.122.200; # Dynamic IP address range default-lease-time 21600; max-lease-time 43200; } # systemctl start dhcpd # systemctl enable dhcpd
Installing the System
On the Start boot option screen, press F2 to boot from the PXE and start automatic installation.
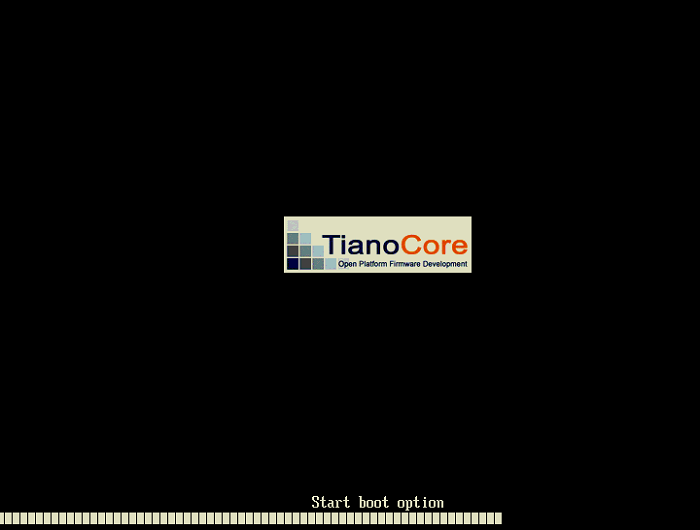
The automatic installation window is displayed.
Verify that the installation is complete.
Licensed under the MulanPSL2
 J.G.W.A.B. No. 11030102011597