Installation and Deployment
This tutorial describes how to install and test the ROS Humble and ROS Noetic software packages that have been released with openEuler.
For details about the development and testing of openEuler ROS, see the subsequent basic tutorials.
Before installing ROS Humble, ensure that the openEuler OS and desktop environment have been installed.
Environment Setup
- Install the openEuler OS. For details, see the official openEuler installation guide.
Installing ROS
ros2 humble
Note:
- On openEuler 22.03, when you run the
yum install openeuler-roscommand, the ROS software source is automatically configured. - On openEuler 24.03 and other versions, you still need to manually add the software source.
- To facilitate fault locating and bug fixing, you are advised to use the software source set in this tutorial instead of the official openEuler source for ROS in openEuler 24.03.
- When manually configuring the software source, pay attention to the EulerOS architecture (x86, Arm, or RISC-V).
1. Setting the Software Source
The following uses openEuler 24.03 as an example to describe how to configure the software source.
Run the following command to configure the software source in the /etc/yum.repos.d/ROS.repo file:
Software source configuration for the x86 architecture:
bashbash -c 'cat << EOF > /etc/yum.repos.d/ROS.repo [openEulerROS-humble] name=openEulerROS-humble baseurl= https://eulermaker.compass-ci.openeuler.openatom.cn/api/ems1/repositories/ROS-SIG-Multi-Version_ros-humble_openEuler-24.03-LTS-TEST4/openEuler%3A24.03-LTS/x86_64/ enabled=1 gpgcheck=0 EOF'Software source configuration for the Arm architecture:
bashbash -c 'cat << EOF > /etc/yum.repos.d/ROS.repo [openEulerROS-humble] name=openEulerROS-humble baseurl=https://eulermaker.compass-ci.openeuler.openatom.cn/api/ems1/repositories/ROS-SIG-Multi-Version_ros-humble_openEuler-24.03-LTS-TEST4/openEuler%3A24.03-LTS/aarch64/ enabled=1 gpgcheck=0 EOF'Software source configuration for the RISC-V architecture:
bashbash -c 'cat << EOF > /etc/yum.repos.d/ROS.repo [openEulerROS-humble] name=openEulerROS-humble baseurl=https://build-repo.tarsier-infra.isrc.ac.cn/openEuler:/ROS/24.03/ enabled=1 gpgcheck=0 EOF'
2. Installing ros-humble
Run the following commands in sequence to install all ROS Humble software packages:
dnf update
dnf install "ros-humble-*" --skip-broken --exclude=ros-humble-generate-parameter-library-example
You can also run the following command to install a single software package:
yum install ros-humble-<package-name>
# or
dnf install ros-humble-<package-name>
For example, run the following commands to install the ROS Humble base package and turtlesim package:
yum install ros-humble-ros-base ros-humble-turtlesimRun the following command to check whether the installation is successful: If the command output contains the corresponding software package, the installation is successful.
[root@openEuler ~]# rpm -q ros-humbleAfter installing the preceding software packages, open the ~/.bashrc file and add the following content:
source /opt/ros/humble/setup.bashAlternatively, run the following command to write the preceding statements to the ~/.bashrc file:
echo "source /opt/ros/humble/setup.bash" >> ~/.bashrcThen, run the source ~/.bashrc command to activate the ROS environment variable settings.
3. Testing the TurtleBot
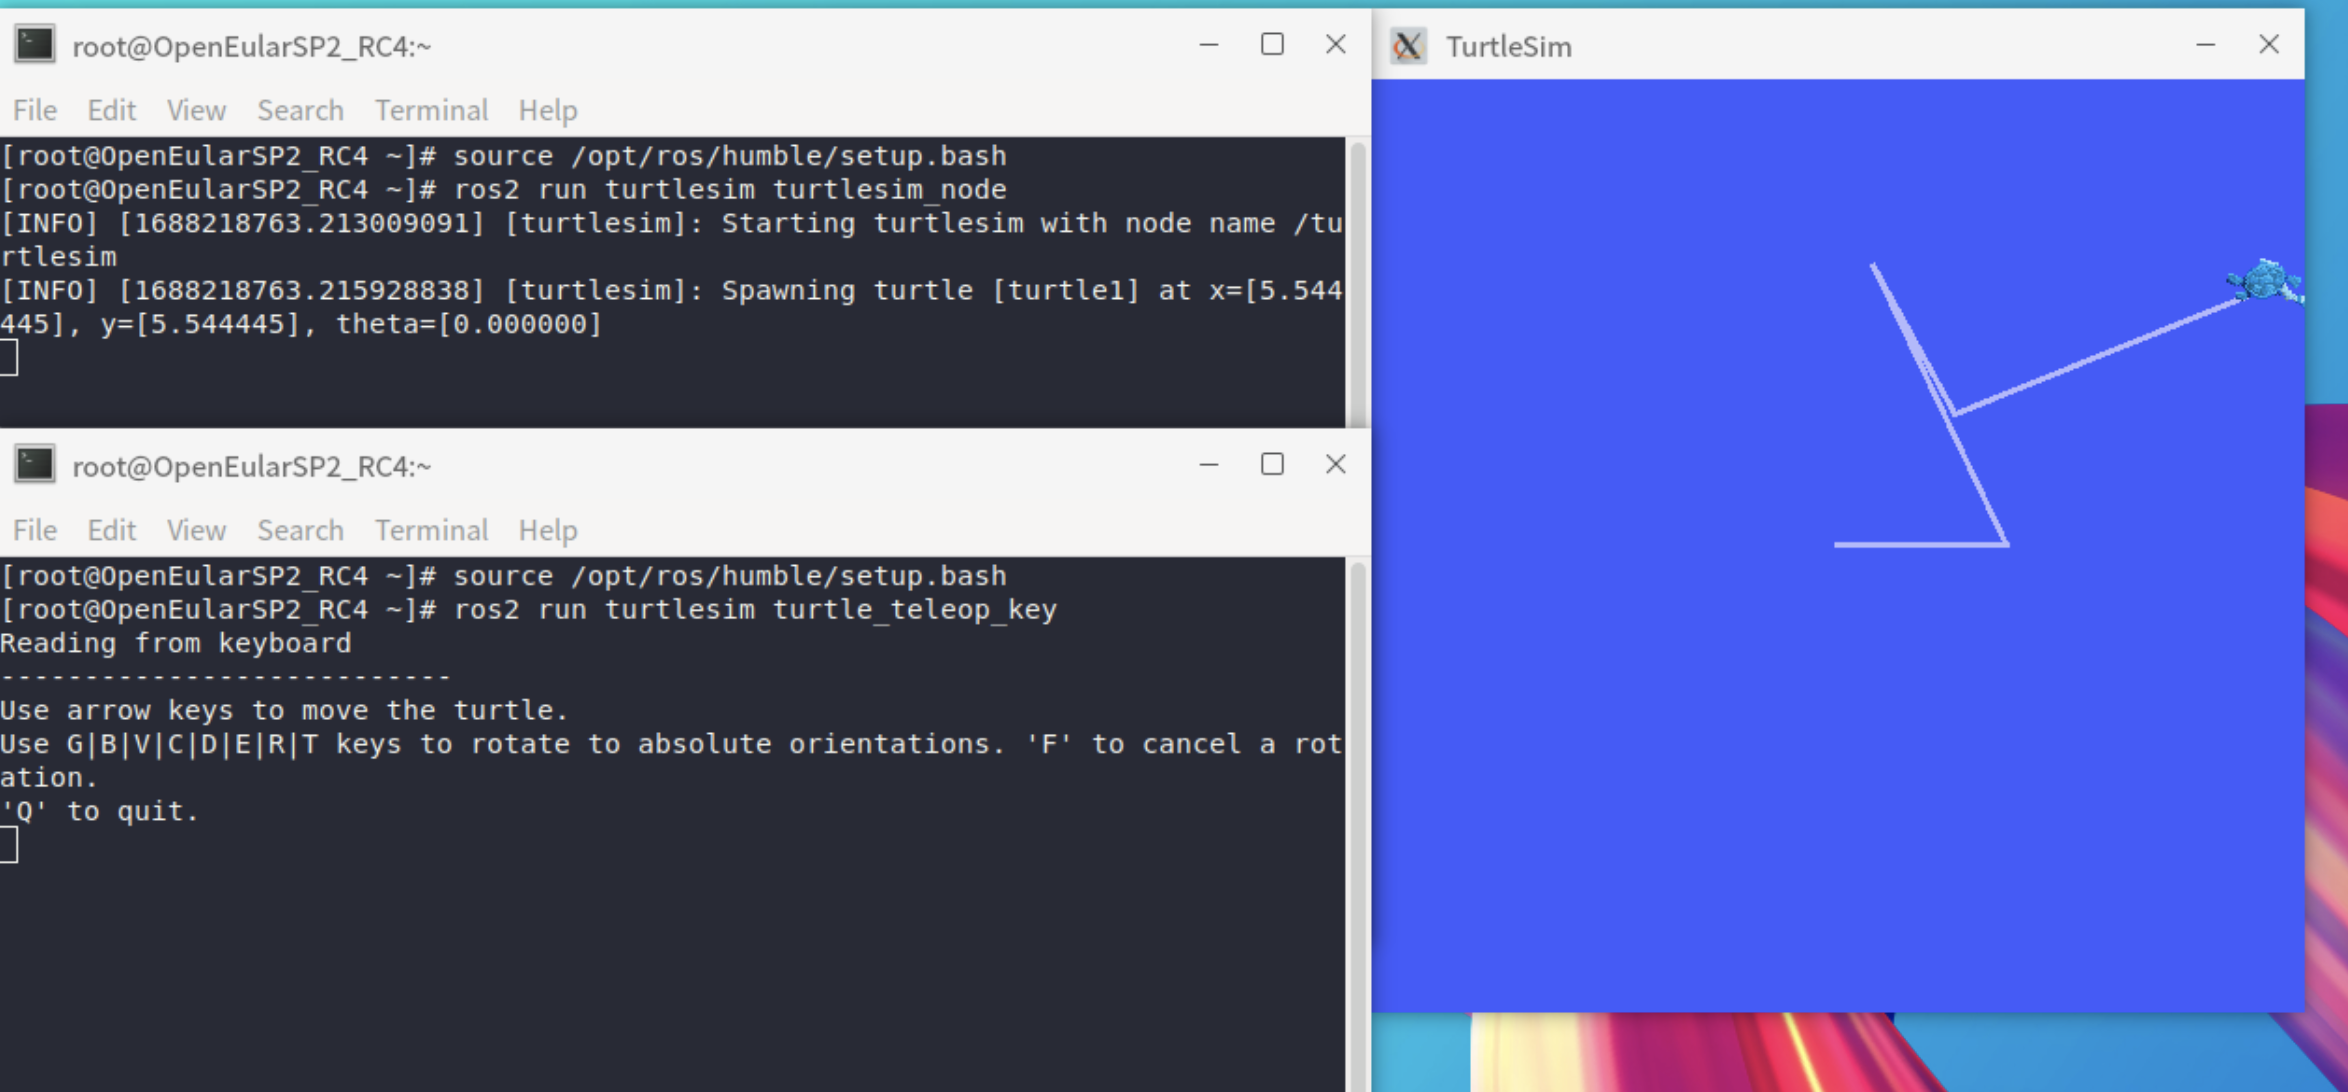
Starting the TurtleBot
shell[root@openEuler ~]# source /opt/ros/humble/setup.bash [root@openEuler ~]# ros2 run turtlesim turtlesim_nodeOpening the TurtleBot control terminal
shell[root@openEuler ~]# source /opt/ros/humble/setup.bash [root@openEuler ~]# ros2 run turtlesim turtle_teleop_keyUsing arrow keys to control the TurtleBot in the control terminal
ros-noetic
1. Setting the Software Source
The following uses openEuler 24.03 as an example to describe how to configure the software source.
Run the following command to configure the software source in the /etc/yum.repos.d/ROS.repo file:
- Software source configuration for the x86 architecture:
bash -c 'cat << EOF > /etc/yum.repos.d/ROS.repo
[openEulerROS-Noetic]
name=openEulerROS-Noetic
baseurl=https://eulermaker.compass-ci.openeuler.openatom.cn/api/ems1/repositories/ROS-SIG-Multi-Version_ros-noetic_openEuler-24.03-LTS-TEST1/openEuler%3A24.03-LTS/x86_64/
enabled=1
gpgcheck=0
EOF'- Software source configuration for the Arm architecture:
bash -c 'cat << EOF > /etc/yum.repos.d/ROS.repo
[openEulerROS-Noetic]
name=openEulerROS-Noetic
baseurl=https://eulermaker.compass-ci.openeuler.openatom.cn/api/ems1/repositories/ROS-SIG-Multi-Version_ros-noetic_openEuler-24.03-LTS-TEST1/openEuler%3A24.03-LTS/aarch64/
enabled=1
gpgcheck=0
EOF'
2. Installing ros-noetic
Install the ros-noetic software package.
[root@openEuler ~]# yum install openeuler-ros
[root@openEuler ~]# yum install ros-noetic-*
Run the following command to check whether the installation is successful: If the command output contains the corresponding software package, the installation is successful.
[root@openEuler ~]# rpm -q ros-noeticAfter installing the preceding software packages, add the following content to the ~/.bashrc file:
[root@openEuler ~]# source /opt/ros/noetic/setup.bashAlternatively, run the following command to write the preceding statements to the ~/.bashrc file:
[root@openEuler ~]# echo "source /opt/ros/noetic/setup.bash" >> ~/.bashrcThen, run the source ~/.bashrc command to activate the settings of the ROS environment variables.
3. Testing the Turtlebot
After installing ROS, open the terminal and run the following command to start the turtlebot simulation test:
rosrun turtlesim turtlesim_node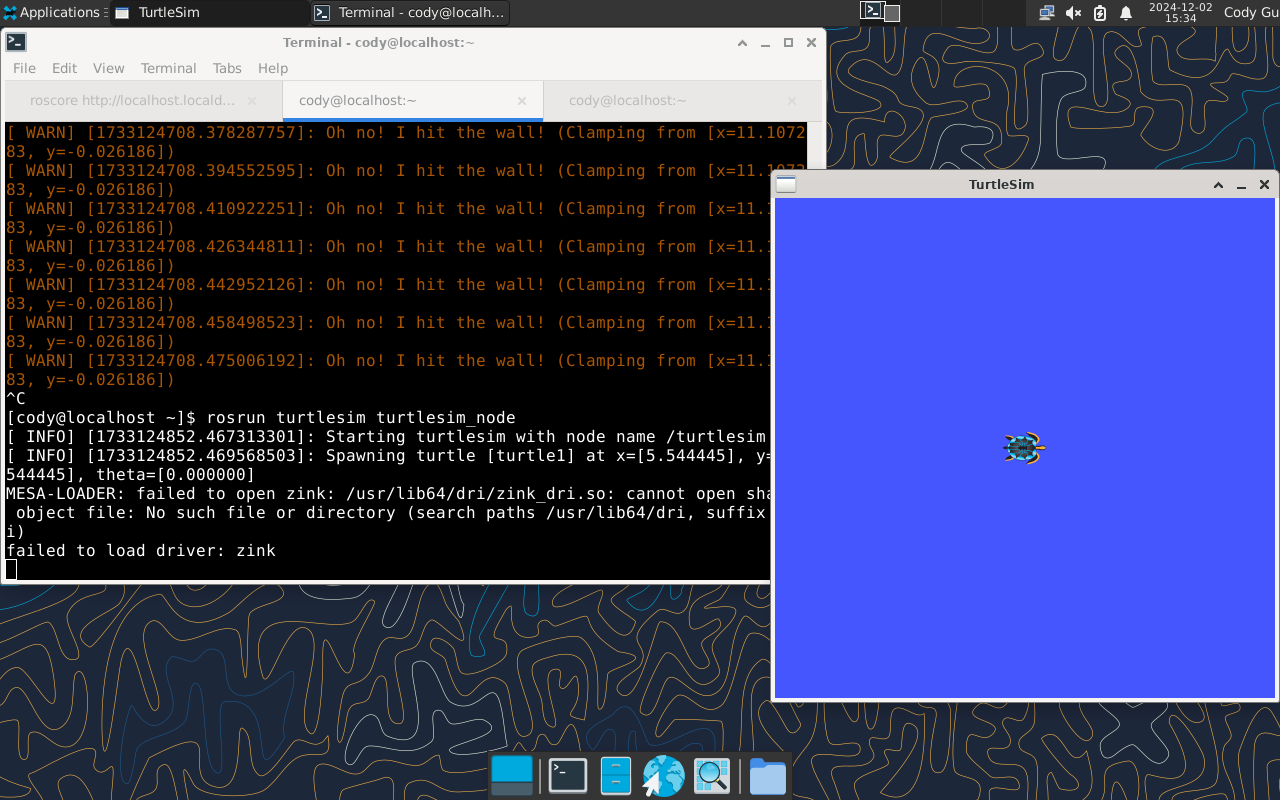
Open a new terminal and run the following command to start the keyboard control node. In the English input mode, press the up, down, left, and right arrow keys on the keyboard to control the turtlebot.
rosrun turtlesim turtle_teleop_key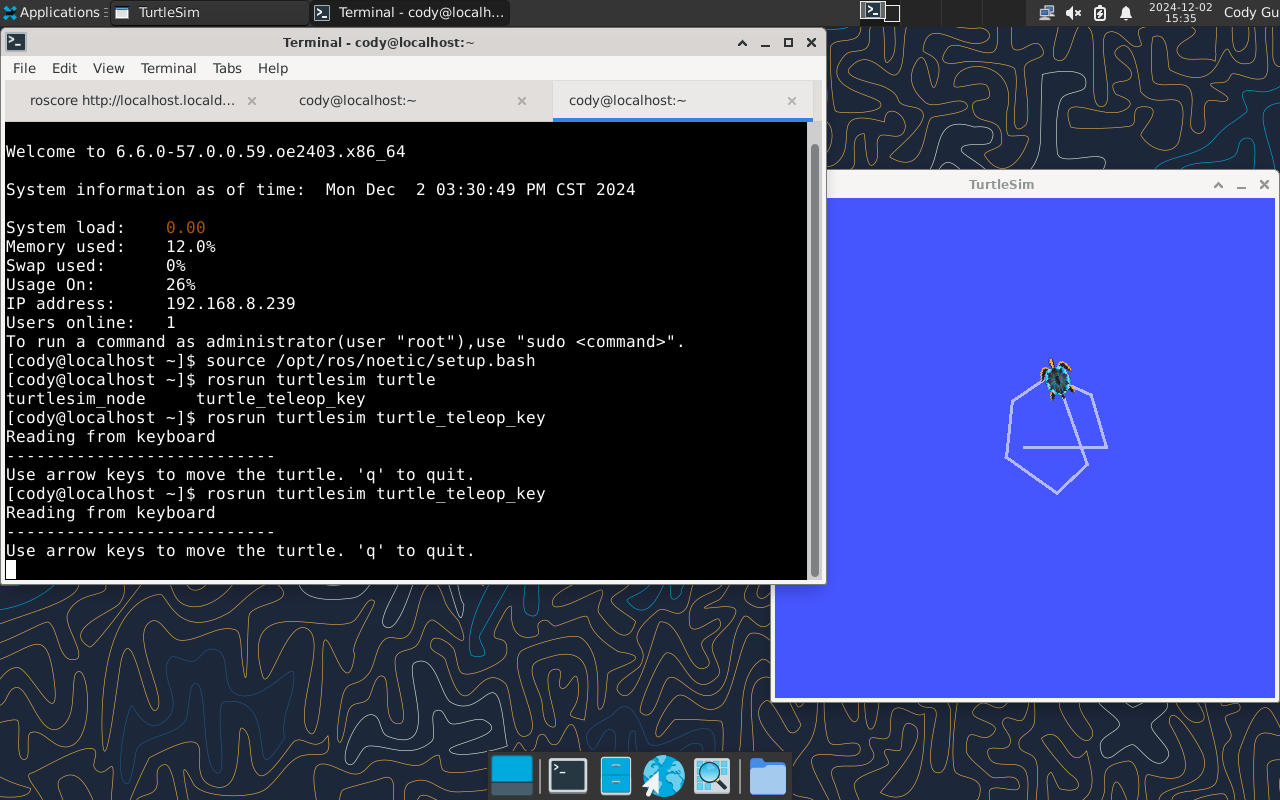
If the simulation test is passed, openEuler ROS Noetic has been successfully installed.
Licensed under the MulanPSL2
 J.G.W.A.B. No. 11030102011597